Satisfaction guaranteed. Call us anytime at 323-731-8453.
Flooring Supply Shop Blog | Flooring and Floor Heating Supply

Is Luxury Vinyl Tile Flooring an Alternative to Traditional Floors

When considering flooring options for your home, durability, aesthetics, and affordability are key factors influencing your decision. Luxury Vinyl Tile (LVT) flooring has recently emerged as a popular alternative to traditional options like hardwood, ceramic tile, laminate, and sheet vinyl. In this blog, we’ll clearly define Luxury Vinyl Tile, delve into its numerous benefits, explore how it compares to traditional flooring options, including vinyl wood flooring, and help you determine if it’s the right choice for your home.

What is Luxury Vinyl Tile (LVT)?

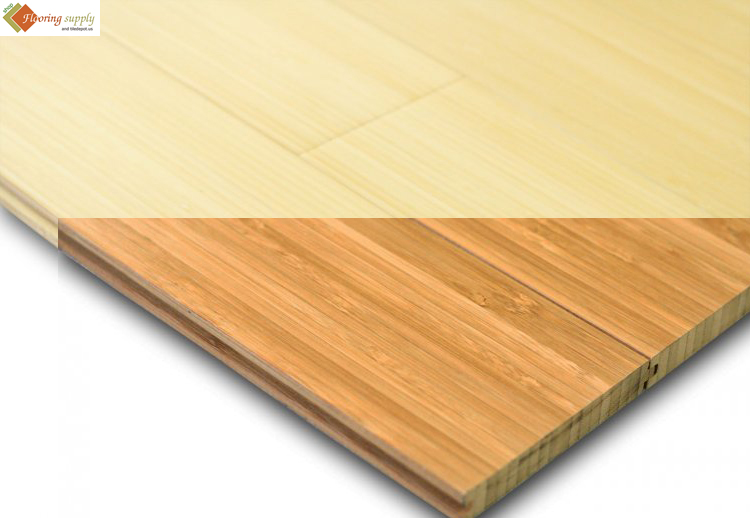
Luxury Vinyl Tile, commonly known as LVT, is a modern flooring solution designed to replicate the look and feel of natural flooring materials like wood and stone. Unlike traditional vinyl flooring, LVT is manufactured in multiple layers, typically including a wear layer, design layer, vinyl core, and backing. This construction offers enhanced durability and improved visual appeal, closely mimicking authentic materials at a fraction of the cost.

Key Benefits of LVT Flooring

LVT flooring offers several notable benefits:

  1. Durability: LVT is highly resistant to scratches, stains, and dents, making it an excellent choice for high-traffic areas. Its robust wear layer ensures that it maintains its appearance over time, even under demanding conditions.
  2. Easy Maintenance: Compared to traditional flooring, LVT requires minimal upkeep. Regular sweeping and occasional damp mopping suffice to keep it looking pristine, a key reason homeowners choose this flooring solution.
  3. Waterproof: One significant advantage of LVT flooring is its waterproof nature. This feature makes it ideal for moisture-prone areas such as kitchens, bathrooms, and basements, where traditional wood flooring might deteriorate.
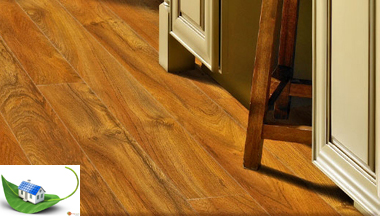
  4. Versatility in Design: LVT comes in a wide array of styles, colors, and textures, including realistic wood and stone finishes. Whether you desire the rustic charm of vinyl wood flooring or the elegance of marble, there’s an LVT option available to match your interior décor.
  5. Comfort and Warmth: Unlike ceramic or stone, LVT offers a warmer underfoot feel and added comfort, reducing fatigue when standing for long periods.
  6. Cost-Effectiveness: Luxury Vinyl Tile offers an affordable alternative to traditional hardwood and stone, without compromising aesthetic appeal or performance.

hardwood-flooring versus vinyl flooring

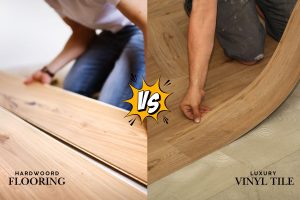
LVT vs Hardwood Flooring: How Do They Compare?

Comparing LVT vs hardwood flooring often involves several considerations:

  • Durability and Maintenance: Hardwood floors, while beautiful, are more susceptible to scratches, dents, and water damage. They also require periodic refinishing. In contrast, LVT’s resilient wear layer offers superior durability with significantly lower maintenance needs.
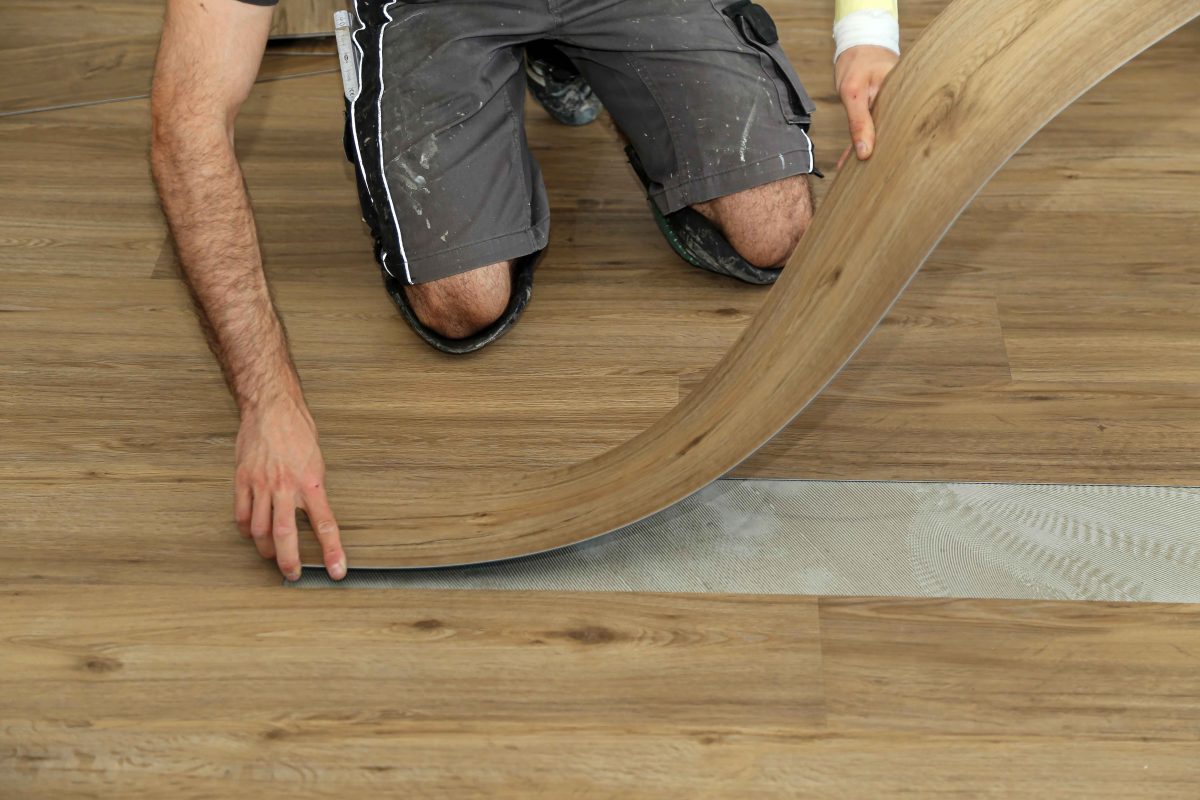
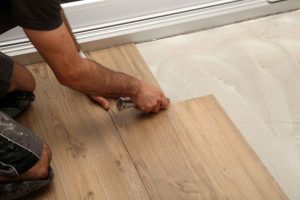
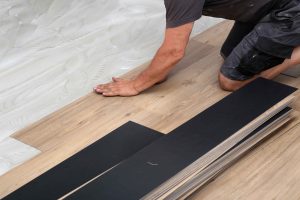
  • Cost and Installation: Hardwood floors typically require professional installation and incur higher upfront costs. Conversely, LVT flooring is generally less expensive and can often be installed as a DIY project due to its click-and-lock installation methods.
  • Aesthetics: While hardwood has a timeless beauty, modern LVT products closely mimic the natural look of wood, offering realistic textures and finishes. For those seeking the visual appeal of wood without the drawbacks, vinyl wood flooring in the LVT category is an excellent choice.
  • Environmental Factors: Hardwood is naturally sourced but requires more environmental resources for harvesting and processing. LVT, however, often incorporates recycled materials, providing a more eco-conscious option.

high-angle-shot-of-the-worker-installing-a-new-vinyl

LVT vs. Traditional Flooring Options

When evaluating LVT against other traditional flooring options such as ceramic tile, laminate, and sheet vinyl, several distinct advantages emerge:

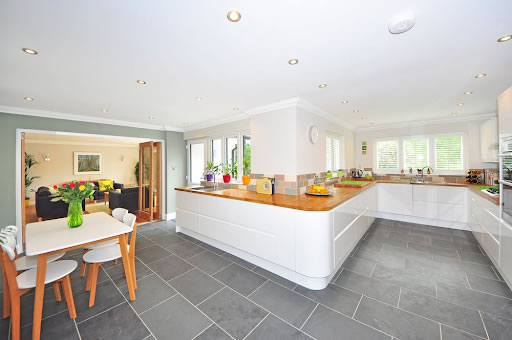
  • Ceramic Tile: While ceramic tile is highly durable and moisture-resistant, it can be cold, hard, and uncomfortable to stand on for extended periods. LVT offers similar moisture resistance but adds warmth, comfort, and better sound absorption, making it more suitable for living spaces and bedrooms.
  • Laminate Flooring: Laminate can replicate wood flooring but lacks LVT’s water-resistant properties. Exposure to moisture can warp laminate, whereas LVT remains stable and intact, making it a superior choice for kitchens and bathrooms.
  • Sheet Vinyl: Sheet vinyl is affordable and water-resistant but doesn’t offer the same visual realism or resilience to heavy wear that LVT does. Additionally, sheet vinyl can be challenging to repair, while individual damaged tiles in LVT floors can be easily replaced without disturbing the entire flooring.

LVT is particularly advantageous in scenarios such as:

  • Bathrooms and Kitchens: The waterproof nature of LVT makes it perfect for moisture-prone areas.
  • Basements: LVT withstands basement conditions better than wood or laminate due to its resilience against humidity and potential flooding.
  • Rental Properties: LVT flooring provides durability and easy maintenance, making it ideal for rental properties where frequent tenant turnover may occur.

worker-installing-new-vinyl-tile-floor-2025

Is Luxury Vinyl Flooring Right for You?

Determining whether Luxury Vinyl Tile flooring is right for you depends on your specific needs and preferences. Consider LVT flooring if:

  • You need flooring that’s durable and easy to maintain.
  • You’re looking for a water-resistant solution suitable for kitchens, bathrooms, or basements.
  • You want the look of hardwood or natural stone without the associated costs and maintenance hassles.
  • You require flooring that offers warmth and comfort underfoot.
  • You’re aiming for an easy DIY installation process.

LVT flooring’s impressive combination of practicality, affordability, aesthetics, and durability makes it an outstanding alternative to traditional flooring options. Whether renovating your home or updating a rental property, LVT delivers both performance and style, ensuring your flooring investment pays off for years to come.

What is a Shower Slope Kit and Why it is Important?

When undertaking bathroom remodeling projects, ensuring proper water drainage is paramount. One essential element that helps achieve this effectively is a shower slope kit. This specialized system ensures the shower floor is properly sloped, allowing water to drain efficiently and preventing water accumulation and potential damage. Here’s everything you need to understand about shower slope kits, including why they’re crucial, available types, selection tips, and purchase options.

What is a Shower Slope Kit?

A shower slope kit is a specifically designed system used during shower floor installations to create the perfect slope required for effective water drainage. It typically consists of pre-pitch sticks or float sticks, crafted from materials such as high-impact plastic with a reinforcing design, to establish a precise gradient directing water toward the drain. These kits eliminate the guesswork often associated with manually forming slopes, providing a foolproof solution even for those without advanced skills in bathroom installations.

Common components of shower slope kits include pitch sticks, extended sticks, and detailed instructions to facilitate easy installation. Most pitch sticks are lightweight and non-rotting, ensuring long-lasting performance. They often come molded of high-impact plastic, reinforcing their durability and efficiency in moisture-rich environments.

extended shower slope kit

Why is a Shower Slope Kit Important?

Proper water drainage in showers is critical to prevent water pooling, mold growth, and structural damage. Without a properly sloped shower floor, water tends to accumulate, creating slippery surfaces and increasing the risk of water seeping into walls and subflooring.

A shower slope kit creates the proper slope needed without requiring extensive plumbing or construction skills. This system significantly simplifies the installation process, making it accessible even for DIY enthusiasts. With built-in pitch forms, these kits ensure consistent and accurate slopes every time, significantly reducing installation errors.

A shower slope kit also protects bathroom integrity by preventing moisture-related issues. Efficient drainage keeps surfaces dry, minimizes mold and mildew growth, and extends the longevity of bathroom materials.

shower slope kit

Types of Shower Slope Kits

Several types of shower slope kits are available, each designed to suit different installation requirements:

1. Pre-Pitch Shower Kits:

These kits come with pitch sticks and reinforcing plastic structures used beneath the shower pan liner. Their purpose is to form an initial slope under the liner, ensuring water moves toward the drain effectively. Pre-pitch sticks are typically sold 4 per package and are easy to handle, being lightweight and non-rotting.

2. Quick Pitch Kits:

Quick pitch kits feature pitch sticks installed above the pan liner and beneath the shower flooring material. These sticks typically have built-in slopes, which quickly create an accurate gradient. Quick pitch systems are straightforward to use, reducing installation complexity, and require no advanced skills.

extended slope kit

3. Extended Sticks Kits:

Extended sticks are ideal for larger showers requiring longer slope gradients. These kits include elongated pitch sticks, tapered x 36 inches, capable of accommodating more extensive shower floor areas effectively.

Each of these kits comes complete with instructions included, ensuring an easy and precise installation process regardless of the chosen type.

How to Choose the Right Shower Slope Kit

Choosing the ideal shower slope kit involves considering several key factors:

Shower Size and Shape:

The dimensions and design of your shower area significantly impact your choice. Smaller showers benefit from standard quick pitch kits, while larger areas may require extended sticks to manage drainage across wider surfaces properly.

Installation Complexity:

Evaluate your installation experience and comfort level. If you’re not skilled in plumbing or construction tasks, opt for quick pitch kits featuring built-in slopes and comprehensive instructions. These kits offer straightforward installations, minimizing errors.

Material Durability:

Ensure the pitch sticks are molded of high-impact plastic, providing longevity and resistance to moisture and damage. Kits made from durable, lightweight, and non-rotting materials are superior for bathroom environments where moisture exposure is constant.

Compatibility:

Verify that the chosen kit aligns with your shower pan liner and flooring materials. Compatibility ensures seamless integration, optimal performance, and maximum water drainage efficiency.

By assessing these factors, you can confidently select the perfect shower slope kit that meets your specific project requirements and ensures durable, effective water management in your bathroom.

flooring supply logo

Where to Buy a Shower Slope Kit?

Selecting a trusted retailer is crucial when purchasing your shower slope kit to guarantee product quality, accurate guidance, and superior customer service. Flooring Supply Shop stands out as an exceptional choice for acquiring reliable shower slope kits and accessories.

Flooring Supply Shop offers an extensive range of shower slope kits, including pre-pitch, quick pitch, and extended stick varieties. Each product is constructed from high-quality materials such as reinforced lightweight plastics, ensuring both durability and ease of use. The kits sold here include comprehensive installation instructions, facilitating easy setups for both DIY enthusiasts and professional contractors.

By choosing Flooring Supply Shop, you gain access to expert advice and a robust selection of bathroom remodeling products that will significantly enhance your shower installation experience. Their kits are specifically designed to create the perfect slope effortlessly, ensuring a professional-quality result every time.

For optimal shower drainage and a reliable installation experience, visit Flooring Supply Shop at to browse and select the ideal shower slope kit for your needs.

Investing in a shower slope kit is a wise decision for any bathroom renovation project. It simplifies installation, ensures efficient water drainage, and significantly reduces potential moisture-related issues. Whether opting for pre-pitch, quick pitch, or extended stick kits, each offers unique benefits tailored to various shower designs and installation complexities.

Understanding these kits, their importance, the types available, and how to select the appropriate one ensures your bathroom remains both functional and aesthetically pleasing for years to come. For quality shower slope kits and excellent customer support, trust Flooring Supply Shop as your reliable partner in bathroom remodeling.

How to Clean Bamboo Floors?

How to Clean Bamboo Floors

Bamboo floors have increasingly become a favorite choice for homeowners because of their sustainable and eco-friendly nature. They are made from natural bamboo, a rapidly renewable resource, offering a stylish and environmentally conscious alternative to traditional hardwood floors. However, like all types of wood floors, bamboo floors require particular care to maintain their beauty and longevity. This article will provide a comprehensive guide on how to clean your bamboo floors effectively while minimizing wear and tear.

Regular Cleaning

Regular cleaning is the first step towards maintaining the beauty of your bamboo floor. This practice helps keep dirt, dust, and grime at bay, reducing the chances of scratching and damaging your floors. A simple, effective method is using a soft bristle broom or a vacuum cleaner, specifically one without a beater bar. Beater bars can potentially scratch or damage the bamboo flooring, and thus should be avoided. A vacuum cleaner will remove even the smallest dust particles without causing any harm.

Use a dry mop, preferably one made from microfiber for a deeper clean. Microfiber mops are ideal for bamboo floors as they easily pick up dust and dirt without leaving scratches. Make sure to mop in the direction of the bamboo grain to minimize potential streaks or marks.

Damp Mop

While dry cleaning is effective for everyday maintenance, sometimes your bamboo floors might require a deeper clean. This is when a damp mop comes in handy. However, like any hardwood, bamboo floors don’t react well to excessive water. Therefore, using a damp mop rather than a wet one is essential.

To clean, first dampen your microfiber mop in warm water and then wring it out thoroughly. Remember, the mop should only be slightly moist, not dripping wet. Gently run the damp mop over your floor, making sure not to leave any puddles or moisture behind.

Cleaning Solutions

While water is usually enough to clean your bamboo floors, stubborn stains may require a bit more. A specifically designed bamboo floor cleaner or mild hardwood floor cleaner can be beneficial in such instances. These cleaning products are formulated to break down grime without damaging the protective finish of your floor.

One popular cleaning solution is oil soap, which is gentle yet effective for wood floors. Simply dilute the oil soap as directed on the package and apply it with a damp mop. Follow up with a clean, dry microfiber cloth to ensure no soap residue is left behind.

Avoid Steam Mops and Harsh Cleaning Products

While steam mops are often touted as an excellent tool for cleaning hardwood floors, they are not recommended for bamboo floors. The intense heat and moisture from a steam mop can cause bamboo to warp or crack.

Additionally, avoid using harsh cleaning products, such as bleach or ammonia-based solutions. These can strip the finish off your bamboo floors and lead to discoloration.

Addressing Wear and Tear

Despite our best efforts, all floors experience wear and tear over time. Scratches and minor dents are part and parcel of a well-loved home. However, there are preventative measures to limit this. Placing rugs in high-traffic areas, using furniture pads, and keeping pet nails trimmed can significantly reduce the chances of scratching your bamboo floors.

Spot Cleaning

Occasionally, spills or stains may occur on your bamboo floors. When this happens, it’s crucial to act quickly to prevent the liquid from seeping into the bamboo and causing damage. Use a clean, dry cloth to blot the spill immediately, avoiding any further rubbing action that may spread the liquid or stain.

You might need more elbow grease for more stubborn stains, such as ink or shoe polish. A small amount of bamboo or hardwood floor cleaner can be applied to a microfiber cloth and gently rub the stain. Remember to avoid using harsh chemical cleaners that can damage the finish of your bamboo floors.

Polishing Your Bamboo Floors

After a thorough cleaning, a polish can help restore the shine to your bamboo floors. Choose a polish designed specifically for bamboo or hardwood floors. Apply the polish with a microfiber mop or cloth, working in small sections and following the grain of the bamboo. Let the polish dry completely before walking on the floor.

Long-Term Maintenance

Even with regular cleaning, bamboo floors may show signs of aging over time. You might notice some discoloration or dulling of the finish. When this happens, it may be time to consider a professional refinishing. This process involves sanding down the top layer of the bamboo and applying a new finish, effectively restoring your bamboo floor to its original luster.

What tools are needed to clean bamboo floors?

1. Soft Bristle Broom or Vacuum Cleaner: A soft bristle broom or a vacuum cleaner without a beater bar is ideal for regular cleaning. These will remove dust and dirt without scratching the bamboo surface.

2. Dry Mop: A dry mop, particularly one made of microfiber, is great for catching any dust or small particles left behind after brooming or vacuuming.

3. Damp Mop: For a deeper clean, you’ll need a mop to dampen. Again, microfiber is a great material as it is soft and less likely to scratch the surface. Just remember, it should be damp, not soaking wet.

4. Bamboo Floor Cleaner or Mild Hardwood Floor Cleaner: These are cleaning solutions specifically designed to be safe for wood and bamboo floors. They can help in tackling stubborn stains or in providing a deeper clean.

5. Microfiber Cloth: This is handy for drying the floor immediately after mopping or cleaning up any spill. It’s also great for applying floor cleaner directly to stains.

6. Bucket: You’ll need a bucket to hold your cleaning solution and to wring out your mop.

7. Bamboo or Hardwood Floor Polish: A specific polish is useful for maintaining the shine and luster of your bamboo floors. This is not for daily use but can be applied every few months or as needed.


FAQ


1. Can I use a steam mop on bamboo floors?

No, steam mops are not recommended for bamboo floors. The intense heat and moisture from a steam mop can cause bamboo to warp, crack, or discolor.

2. Can I use vinegar to clean bamboo floors?

While vinegar is a popular natural cleaner, it’s generally not recommended for bamboo floors. Vinegar is acidic and can dull the finish of your bamboo floor over time. Sticking with a cleaner specifically designed for bamboo or hardwood floors is best.

3. How often should I clean my bamboo floors?

The cleaning frequency depends on the foot traffic your floors receive. However, as a general rule, dry mopping or vacuuming should be done weekly, while a more thorough clean using a damp mop and cleaner should be done monthly. Remember, the key to bamboo floor longevity is regular cleaning.

4. Can I use oil soap to clean bamboo floors?

Yes, oil soap can be used to clean bamboo floors. It’s a gentle cleaner that can effectively remove dirt and grime without damaging your floor. Remember to dilute the oil soap as directed on the package and avoid leaving any soap residue behind.

5. How do I remove stains from my bamboo floor?

First, clean the area with a damp cloth for common stains. If the stain persists, use a bamboo or hardwood floor cleaner. Apply the cleaner to a soft cloth and gently rub the stain until it’s gone. Avoid using harsh chemical cleaners that can damage the finish of your bamboo floors.

6. How do I restore the shine to my bamboo floors?

Applying a polish specifically designed for bamboo or hardwood floors can help restore shine. Make sure to clean the floor thoroughly before applying the polish, and let it dry completely before walking on it.

7. How do I prevent scratches on my bamboo floors?

Placing rugs in high-traffic areas, using furniture pads, and keeping pet nails trimmed can significantly reduce the chances of scratching your bamboo floors. Regular cleaning also helps minimize dust and dirt that can cause scratches.

Remember, it’s always a good idea to consult with the manufacturer’s instructions or a flooring professional when you’re unsure about cleaning and maintaining your bamboo floors.


In summation, the role that diligent and appropriate care plays in the preservation of bamboo flooring cannot be overstated. Bamboo, an increasingly popular flooring choice due to its sustainable sourcing and aesthetic appeal, necessitates specific maintenance practices to uphold its enduring quality and visual allure.

Adherence to correct cleaning methodologies, the utilization of appropriate equipment, and the selection of suitable cleaning agents are all imperative facets of bamboo floor maintenance. Swift action in addressing inadvertent spills or stains is highly recommended, alongside a conscious effort to abstain from potentially detrimental practices such as using steam mops or harsh chemical cleaners.

Furthermore, it is vital to acknowledge that despite their robustness, bamboo floors are not impervious to daily use’s regular wear and tear. As such, incorporating preventative measures can notably extend the lifespan and aesthetic continuity of your bamboo flooring. By observing these guidelines, the integrity of your bamboo floors will be effectively safeguarded, providing you with a sustainable and attractive flooring solution for years to come.

Guide in Choosing the Right Flooring Supplies

Selecting the right flooring supplies is an important first step when renovating or building a new space from the ground up. Not only does the flooring materials you choose contribute to the overall aesthetics of the space but it also plays a significant role in its functionality and durability. With a wide range of options available on the market, finding the perfect flooring types can be a daunting task. So, to help simplify the process, here is a comprehensive guide to assist you in choosing the best flooring materials for your needs. 

1. Consider lifestyle and usage

Here at Flooring Supply Shop, we believe the first step to selecting the right flooring materials is to consider your lifestyle ad how the space will be used. Different areas o your home or commercial space may require varied flooring supply installation. For example, high-traffic areas like entryways, hallways, and kitchens demand more durable and easy-to-clean flooring materials, such as ceramic tiles, vinyl planks, or laminate. Moreover, bedrooms and living rooms can benefit from the warmth and comfort of carpet or hardwood flooring


2. Assess maintenance requirements

Another important thing to consider is the maintenance and upkeep required for all of the flooring types. Some flooring materials, like natural stone or hardwood, require regular maintenance, such as sealing, polishing, or refinishing, to keep them looking great. Whereas, options like laminate or vinyl require very minimal maintenance. Before your flooring supply installation, assess your willingness and ability to maintain your chosen flooring, and be sure to choose a material that aligns with your preferences and lifestyle. 


3. Durability and longevity are key

We recommend opting for flooring materials that can withstand wear and tear, spills, and impacts, no matter which living space. While all flooring materials, if properly cared for, can last a long time, hardwood, vinyl, and ceramic tile are the top three flooring types known for durability and longevity. Additionally, you should consider the warranty offered by the manufacturer, as it can give you an indication of the expected lifespan and performance of the flooring. 


4. Evaluate moisture resistance 

Moisture resistance is crucial, particularly for places like the bathroom, laundry room, or basement. Since moisture can cause damage, warping, or mold growth in certain flooring materials, you need to select flooring types such as ceramic tiles, porcelain tiles, vinyl, or concrete for moisture-prone spaces. However, if you prefer the look of wood, there are types of specialized engineered wood that mimic the look but have better moisture resistance. 


5. Comfort and acoustics

While usually at the bottom of one’s list of considerations, the comfort underfoot and acoustics are especially important for areas like bedrooms and living rooms where you will be spending most of your time at home. Carpet and cork flooring are known for their softness and their ability to absorb sound, making them ideal flooring types for creating a cozy and comfy environment. Alternatively, if you prefer hard surfaces, it’s easy to select area rugs or have acoustic underlays put in during your flooring supply installation to improve comfort and reduce noise in a room. 


6. Have a budget in mind

At the end of the day, you can only select the flooring materials and types that meet your budget. So, before risking any sort of disappointment, determine how much you are willing to spend and explore the flooring options within that price range. Keep in mind that while materials range in price, there may also be additional costs incurred for installation, underlayment, and maintenance. 


7. Seek professional advice

If you are still unsure about what flooring materials are needed for your space, don’t hesitate to reach out and speak with a Flooring Supply Shop specialist. Our team is made up of flooring experts who can provide you with some valuable insight and recommendations based on their years in the business. They can also help you to navigate through various options, consider your specific needs and preferences, and guide you toward the most suitable flooring materials.


Choosing the right flooring supplies can make all the difference in your renovation project. Our infographic offers a clear, step-by-step guide to help you pick the best materials based on style, durability, and budget—making your flooring decision easier and smarter.

Guide in Choosing the Right Flooring Supplies

How to Clean Porcelain Tile Floors

Tile Flooring

Porcelain tile floors are a testament to beauty, sophistication, and practicality, a perfect amalgamation of elegance with robustness. They grace your homes and offices with their ethereal presence, promising longevity and durability that few other flooring options offer. However, these flooring marvels require a dedicated cleaning regimen tailored to their unique attributes to retain their pristine condition and ensure their longevity. Understanding the correct cleaning methods for different types of porcelain tiles—whether polished or unpolished—is fundamental to maintaining their charming aesthetics and structural integrity. This article provides you with an in-depth guide to effectively cleaning solution, keeping them as gleaming and inviting as the day they were laid.

Know Your Porcelain Tiles

Before you begin cleaning, it’s essential to know what kind of porcelain tiles you have. There are primarily two types: unglazed and glazed. Unglazed porcelain tiles have a natural, matte finish, while glazed porcelain tiles feature a glossy protective layer. The cleaning techniques for both types slightly differ, so identification is the first step toward proper maintenance.

Cleaning Supplies

To clean porcelain tile floors, you’ll need a few basic items:

  1. Mild Detergent or Porcelain Tile Cleaner: Mild detergents are suitable for cleaning porcelain tiles because they effectively remove dirt without damaging the tile’s surface. Porcelain-specific cleaners are available in the market and are specially formulated to care for this type of flooring. They’re designed to preserve the tile’s integrity, prevent discoloration, and maintain its shine. If you decide to use a commercially-prepared porcelain tile cleaner, always follow the manufacturer’s instructions for use.
  2. Soft-bristle Broom or Vacuum Cleaner: Loose dust, dirt, and grit on your tile floors can act like sandpaper, causing scratches and wear over time. Regularly sweeping or vacuuming your floors is essential to maintaining their beauty. A soft-bristle broom will ensure that you can sweep away the dirt without scratching the surface of the tiles. On the other hand, a vacuum cleaner, especially one with a ‘hard floor’ setting, can be an excellent tool for removing dust and dirt from corners and crevices that a broom might miss.
  3. Microfiber Mop or Cloth: A microfiber mop or cloth is highly recommended for cleaning porcelain tiles. These are soft, super absorbent, and effective at trapping dirt, debris, and bacteria. Unlike traditional mops or cloth materials, Microfiber won’t scratch the surface of your tiles. Moreover, their high absorbency ensures that they don’t leave excess water on your floors, which could otherwise lead to water spots or damage.
  4. Warm Water: Warm water enhances the effectiveness of the cleaning solution, helping to dissolve dirt and grime faster than cold water. It also helps in even spreading and easy rinsing of the detergent or cleaner.
  5. Soft, Dry Towel: A soft, dry towel is crucial for drying your floors after washing them. Excess water can seep into the grout lines, leading to mold or mildew growth, or cause water spots on the tiles. Additionally, quick drying prevents the risk of slipping on the wet floor.


Remember, you should always avoid harsh or abrasive cleaners when cleaning porcelain tiles. These can cause damage to the tile surface, leading to dullness and scratches over time. Steel wool or harsh scrubbing tools can similarly damage the tiles and should be avoided. Also, always choose a cleaner that is pH-neutral. Acidic or alkaline cleaners can discolor the tiles and degrade the grout. A pH-neutral cleaner is gentle yet effective and maintains the color and integrity of your porcelain tiles.

Regular Cleaning Routine

  1. Sweep or Vacuum: The first step in your cleaning routine should be to remove loose dust and dirt. Use a soft-bristle broom or a vacuum cleaner to gently remove any debris from your floor. Be sure to reach into the corners and along baseboards where dust tends to accumulate.
  2. Mop the Floor: Fill a bucket with warm water and add a mild detergent or a special porcelain tile cleaner as per the instructions on the product label. Dampen your microfiber mop or cloth in the solution and wring out excess water. Mop your porcelain tile floor thoroughly, ensuring no soapy residue is left behind.
  3. Rinse Well: After mopping the floor with the cleaning solution, rinse the mop with clean water. Mop the floor again with clean water to remove all soap from the tiles. Excess soap can leave behind a dull film that detracts from the natural beauty of the porcelain.
  4. Dry the Floor: After rinsing, it’s crucial to dry your floor properly to avoid water spots or streaks. Use a soft towel or a microfiber cloth to dry the floor. Ensure that the floor is completely dry to prevent any slips or falls.

Dealing With Stains

Occasionally, you may notice stains or spots on your porcelain tiles. In such cases, a spot treatment may be necessary. Apply a small amount of your cleaning solution directly onto the stain and let it sit for about 10 minutes, then scrub gently with a soft brush or cloth. Rinse the area thoroughly with warm water and dry with a towel.

Cleaning Polished Porcelain Tile

Polished porcelain tiles have a sleek, shiny finish that adds a touch of elegance to any room. These tiles have been mechanically treated to achieve a mirror-like finish. Here’s how to clean them:

  1. Remove Loose Debris: Start by sweeping or vacuuming the tiles to remove any loose dirt or dust. This step is crucial as small particles can scratch the polished surface during cleaning.
  2. Prepare Cleaning Solution: Mix a mild detergent or a pH-neutral cleaning solution specifically designed for polished porcelain tiles with warm water in a bucket. Always follow the manufacturer’s instructions for the correct proportions. Avoid using harsh chemicals or acidic solutions as they may damage the polished surface.
  3. Mop the Floor: Using a microfiber mop, gently mop the floor with the cleaning solution. Avoid using excessive water or allowing the solution to sit on the tiles for an extended period, as it could seep into the grout or under the tiles, causing potential damage.
  4. Rinse and Dry: Rinse the mop with clean water, then mop the floor again to remove any soap residue. After mopping, dry the floor immediately with a soft towel to prevent water spots, streaks, or damage from standing water.

Cleaning Unpolished Porcelain Tile

Unpolished porcelain tiles, also known as matte porcelain tiles, have a natural, slightly textured finish. Cleaning these tiles involves a similar process but with a few key differences:

  1. Remove Loose Debris: Begin by removing any loose dust or dirt with a soft-bristle broom or vacuum cleaner.
  2. Prepare Cleaning Solution: Use a mild detergent or a pH-neutral cleaner meant for unpolished porcelain tiles. Dilute it with warm water according to the manufacturer’s instructions.
  3. Pre-wash the Floor: Before applying the cleaning solution, wet the surface of the tiles with clean, warm water. This pre-washing process helps the tiles resist absorption of the cleaning solution into their slightly porous surface, making the cleaning process more effective.
  4. Mop the Floor: Using a microfiber mop, apply the cleaning solution to a manageable section of the floor. Allow it to sit for five minutes to loosen any grime, but do not allow the solution to dry on the tiles.
  5. Scrub as Needed: For tougher stains, scrub the tiles gently using a soft brush or cloth. Do not use steel wool or abrasive scrubbers as they can scratch the tile surface.
  6. Rinse and Dry: Rinse the area with clean water to remove the cleaning solution, then dry the tiles immediately with a soft, absorbent towel to prevent water stains or damage.

For both polished and unpolished porcelain tiles, regular cleaning and immediate attention to spills or stains will ensure that your floors remain beautiful and durable for years to come.

FAQ

Q: Can I use vinegar or bleach to clean porcelain tiles?
A: Vinegar and bleach are both highly acidic and can damage your porcelain tiles over time. They can cause discoloration and degrade the tile’s surface. It’s best to use a pH-neutral cleaner for porcelain tiles.

Q: How often should I clean my porcelain tile floors?
A: For general upkeep, it’s recommended to sweep or vacuum your porcelain tile floors daily to remove dust and debris. Mopping should be done weekly or as needed, depending on the foot traffic the area receives.

Q: Can I use a steam mop on porcelain tiles?
A: Yes, a steam mop can be used on porcelain tiles. However, ensure to use it according to the manufacturer’s instructions and avoid using it on unsealed grout lines as it can cause damage.

Q: What should I do if a stain doesn’t come out?
A: If a stain doesn’t come out with regular cleaning, you may need a commercial porcelain tile cleaner designed for deep stains. However, always test it in an inconspicuous area first to ensure it doesn’t discolor the tile.

Q: Can I use a scrub brush on porcelain tiles?
A: It’s best to avoid using scrub brushes or any abrasive cleaning tools on porcelain tiles as they can scratch the surface. Instead, use a soft cloth or sponge.

Q: How can I restore the shine to my glazed porcelain tiles?
A: Regular cleaning with a pH-neutral cleaner and avoiding harsh or abrasive materials will help maintain the shine on glazed porcelain tiles. If the tiles still look dull, consider using a commercial tile polish that’s safe for porcelain.

Q: What can cause porcelain tiles to crack or chip?
A: While porcelain tiles are very durable, they can crack or chip if heavy objects are dropped on them. Loose or shifting tiles due to underlying surface or grout issues can also lead to cracking. Regular maintenance of both the tiles and grout can help prevent damage.

Q: How can I clean the grout between my porcelain tiles?
A: Grout can be cleaned using a mild, bleach-free cleaner and a soft brush. For stubborn stains, a grout stain remover can be used. However, always test any product in an inconspicuous area first to ensure it won’t discolor the grout or tiles.

Q: Can I use wax on my porcelain tiles?
A: It’s generally not recommended to use wax on porcelain tiles. Wax can build up over time, causing the tiles to look dull and attracting more dirt and grime. Instead, maintain the tiles with regular cleaning and use a tile polish if necessary.

Q: Do I need to seal my porcelain tiles?

A: Glazed porcelain tiles don’t need to be sealed as they already have a protective layer. However, unglazed porcelain tiles are more porous and may benefit from sealing to prevent stains and damage. Always check with the tile manufacturer or a flooring professional to see if your specific tiles need sealing.

Final Thoughts

Regular cleaning is key to maintaining the beauty and durability of your porcelain tile floors. Remember to use non-abrasive and pH-neutral cleaning products and tools to avoid any damage. With regular sweeping, mopping, and occasional spot cleaning, your porcelain tiles can retain their stunning aesthetic appeal and last many years. The effort you put into maintaining your floors will surely pay off in the long run, rewarding you with a clean and welcoming home.

Flooring Supply Shop Blog | Flooring and Floor Heating Supply