Satisfaction guaranteed. Call us anytime at 323-731-8453.
Bathroom Accessories | Flooring Supply Shop Blog

Can You Tile Over Tile?

Are you considering updating your floors or walls without the hassle of removing old tiles? Tiling over existing tile can be a time-saving and cost-effective solution that spares you from the mess and effort of a complete removal. However, this approach requires careful consideration and preparation to ensure a successful and long-lasting result. In this guide, we will thoroughly explore whether tiling over tile is possible, the necessary steps to do so, and the advantages and disadvantages of this method. Whether you’re a DIY enthusiast or considering professional help, this comprehensive guide will provide you with all the information you need to make an informed decision.

Is Tiling Over Tile Possible?

Yes, tiling over tile is possible and can be an efficient way to upgrade your flooring or wall surfaces without the mess of removing old tiles. However, it is crucial to evaluate the condition of the existing tiles and the underlying surface to ensure they are sound and stable.

Preparatory work for tiles

Pros and Cons of Tiling Over Tile

Pros:

  • Time-Saving: Eliminates the need to remove old tiles, reducing the project timeline.
  • Less Mess: Avoids the dust and debris associated with tile removal.
  • Cost-Effective: Saves on labor and disposal costs associated with removing old tiles.

Cons:

  • Height Increase: Adds height to the floor or wall, which may affect doors, cabinets, and appliances.
  • Weight Concerns: Adds extra weight, which could be an issue for certain structures.
  • Surface Integrity: Requires that the existing tile and substrate be in excellent condition.

Worker cutting tiles

Steps to Tile Over Tile

Step 1: Assess the Existing Tile
Before beginning, inspect the current tiles to ensure they are well-adhered and in good condition. Check for loose tiles, cracks, or other damage. The existing surface must be smooth and stable to support the new tiles.

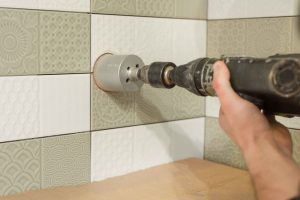
Step 2: Prepare the Surface
Clean the existing tiles thoroughly to remove any dirt, grease, or grime. This step is crucial for the adhesive to bond properly. Use a degreaser or a strong cleaner to ensure the surface is completely clean.

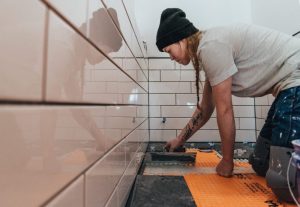
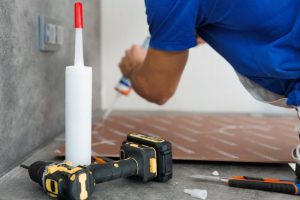
Step 3: Apply the Adhesive
Choose a high-quality tile adhesive suitable for tiling over tiles. Apply the adhesive evenly across the surface using a notched trowel. Ensure the adhesive is spread uniformly to avoid any air pockets.

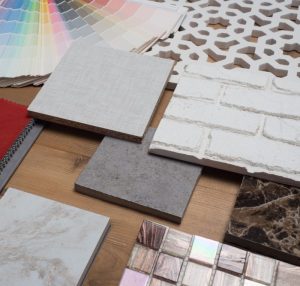
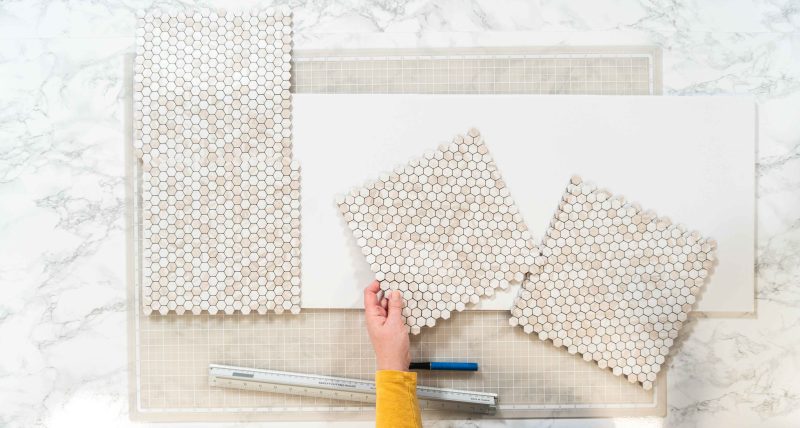
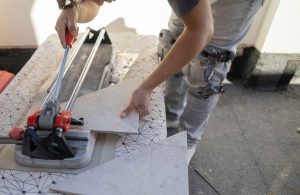
Step 4: Lay the New Tiles
Start laying the new tiles from the center of the surface, working your way outwards. Press each tile firmly into the adhesive, ensuring they are level and properly aligned. Use spacers to maintain even grout lines.

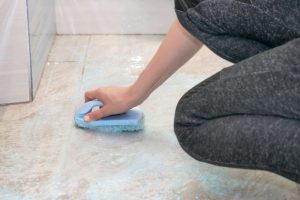
Step 5: Grout and Finish
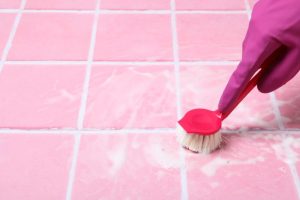
Allow the adhesive to cure according to the manufacturer’s instructions before applying grout. Once the adhesive is set, apply grout between the tiles using a rubber float. Wipe away excess grout with a damp sponge and allow it to dry. Seal the grout to protect it from stains and moisture.

Designer selecting the right tiles design

Tips for a Successful Tile Over Tile Installation

  • Use Thin Tiles: Opt for thin tiles to minimize the increase in height.
    Check for Level: Ensure the existing tiles are level to avoid issues with the new installation.
  • Seal Grout Lines: Seal the grout lines of the existing tiles to prevent moisture from seeping through.
  • Use Quality Adhesive: Invest in a high-quality adhesive designed for tile-over-tile applications.

Frequently Asked Questions

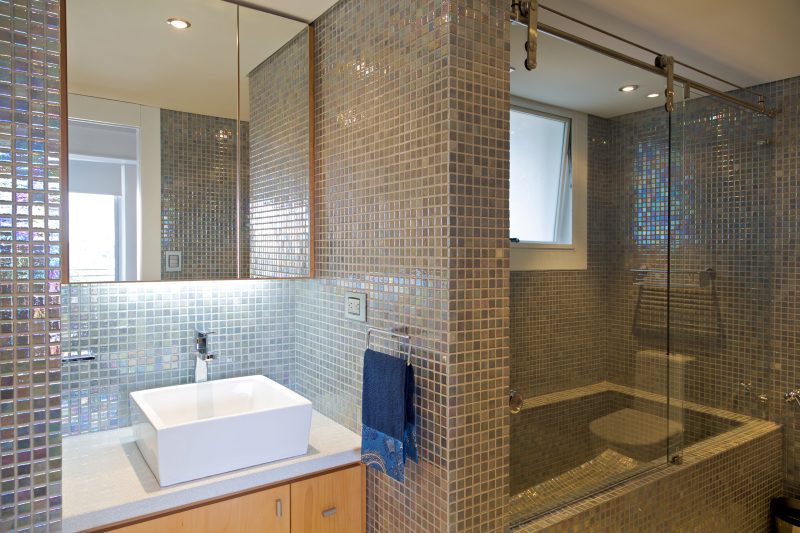
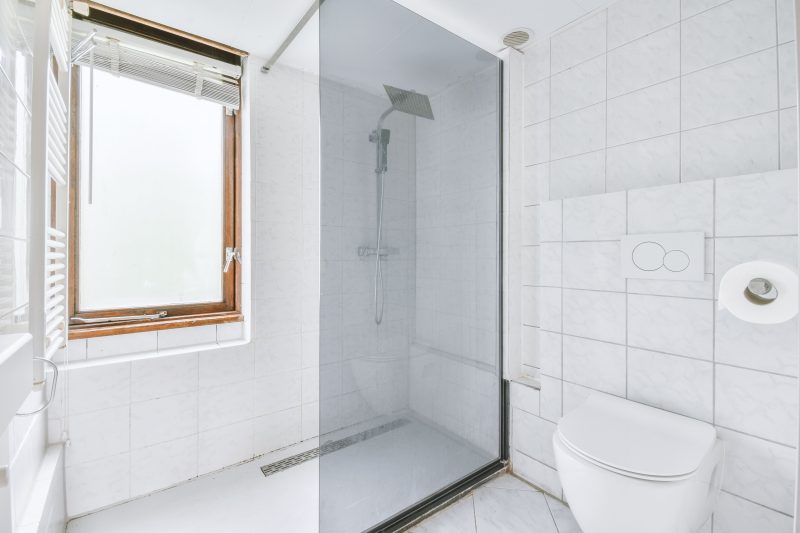
1. Can you tile over tile in a bathroom?
Yes, you can tile over tile in a bathroom, but ensure the existing tiles and substrate are in good condition and the surface is properly prepared.

2. How do I know if my existing tile is suitable for tiling over?
Check for loose tiles, cracks, and the overall integrity of the existing tiles. If they are firmly attached and in good condition, you can tile over them.

3. What type of adhesive should I use for tiling over tile?
Use a high-quality thinset mortar or an adhesive specifically designed for tiling over existing tiles.

4. Will tiling over tile affect the height of my floor?
Yes, tiling over tile will increase the height of your floor, which may require adjustments to doors, cabinets, and appliances.

5. Is tiling over tile a DIY-friendly project?
Tiling over tile can be a DIY project if you have experience with tiling. However, for best results, consider hiring a professional.

Tiling over existing tiles can be a practical and cost-effective way to update your space. If you follow the steps in this guide and carefully assess the condition of the current tiles, you can achieve a beautiful and long-lasting finish. Make sure to use high-quality materials and take your time to ensure a successful installation.

Top Tile Cleaning Mistakes to Avoid for Sparkling Floors and Walls

Keeping your tile floors and walls clean not only enhances the beauty of your home but also extends the life of the tiles. However, in our zeal to maintain a sparkling home, we often commit mistakes that can damage the tiles or grout, making them look dull and aged. Here are some common tile-cleaning mistakes you should avoid and tips on how to clean your tiles effectively.

Harsh Chemical Bottles in the Bathroom

1. Using Harsh Chemicals

One of the most common mistakes is using harsh chemicals like bleach or ammonia-based cleaners. These substances can erode the grout and fade the color of your tiles over time. Instead, opt for pH-neutral cleaners specifically designed for tile and grout. These gentler solutions clean effectively without causing damage.

How to Prevent:

  • Use mild, pH-neutral cleaning solutions.
  • Read labels carefully to ensure the cleaner suits your type of tile.

Overlooking grout in the bathroom

2. Overlooking the Grout

Grout is porous and can easily absorb dirt, leading to discoloration and staining. Ignoring the grout when cleaning tiles is a mistake that can make your floors or walls look unkempt.

How to Prevent:

  • Clean grout lines regularly with a grout cleaner and a small brush.
  • Seal your grout yearly to protect it from stains and make cleaning easier.

Scrubbing tiles in the bathroom

3. Scrubbing Tiles with Abrasive Tools

Scrubbing your tiles with steel wool or other abrasive scrubbers can scratch and dull their surface. This not only ruins the aesthetic but can also make the tiles more susceptible to staining.

How to Prevent:

  • Use soft cloths or non-abrasive sponges for cleaning.
  • For tougher stains, apply a gentle cleaner and let it sit for a few minutes before wiping it away.

Brushing Tiles Bathroom

4. Not Rinsing After Cleaning

Leaving cleaner residue on your tiles can attract dirt and grime, making them look dirty soon after cleaning. It’s essential to thoroughly rinse the tiles with clean water after using any cleaning solution.

How to Prevent:

  • After cleaning, mop or wipe the area with clean water.
  • Dry the tiles with a clean cloth to prevent water spots.

Too much water on tiles

5. Using Too Much Water on Natural Stone Tiles

Natural stone tiles, such as marble or granite, are sensitive to excessive moisture, which can penetrate and cause damage. Using too much water when cleaning these tiles can lead to staining and erosion of the natural stone.

How to Prevent:

  • Use a damp mop or cloth rather than a wet one.
  • Immediately dry the area after cleaning to remove any standing water.

Use of Vinegar on tiles

6. Neglecting the Power of Vinegar

Vinegar is a natural cleaning powerhouse that can tackle many tile-cleaning tasks safely and effectively:

Dissolves Mineral Deposits: Vinegar’s acidity helps dissolve hard water stains and soap scum, leaving your tiles sparkling clean.

Cuts Through Grease: For greasy messes, a diluted vinegar solution can be a great alternative to harsh chemical cleaners.

Solution: Mix equal parts water and white vinegar in a spray bottle. Use it for routine cleaning, spot-cleaning spills, and even freshening grout.

Applying sealant on tiles

7. Ignoring the Sealant

Many tiles require periodic sealing to protect them from stains and moisture damage:

Unsealed Grout: Unsealed grout is more susceptible to staining and mildew growth.

Etching and Staining: Unsealed tiles are more prone to etching and staining from acidic substances.

Solution: Make sure to follow your tile manufacturer’s instructions for sealing and reapply sealant as needed to maintain protection.

Different Type of Tiles on the Floor

8. Assuming All Tiles Are the Same

Different materials—ceramicporcelain, natural stone—require different care. Using the same cleaning method for all types of tiles can lead to damage. For example, natural stone tiles are more sensitive to acidic cleaners than ceramic or porcelain tiles.

How to Prevent:

  • Identify your tile type and research the best cleaning methods for it.
  • When in doubt, consult the manufacturer’s guidelines or a professional.

It’s important to maintain the luster and longevity of your tiles through the right approach and not just regular cleaning. Avoiding common tile cleaning mistakes such as using harsh chemicals, neglecting grout, employing abrasive scrubbing tools, failing to rinse after cleaning, overusing water on natural stone, and treating all tiles the same can significantly contribute to the preservation and appearance of your tiles. By adopting gentle and appropriate cleaning practices tailored to your tile type, you ensure that your floors and walls remain pristine, enhancing your home’s overall ambiance. Remember, the key to sparkling tiles lies in cleaning them and cleaning them correctly.

How to clean a Shower Drain?

Maintaining a spotless shower drain is vital for preventing clogs and ensuring your bathroom remains a clean, inviting space. At the Flooring Supply Shop, we specialize in providing high-quality products like the quartz linear shower drain with brushed stainless-tile insert and many more products designed to facilitate easy and effective cleaning. Incorporating key maintenance steps and the right products, such as drain plugs and drain cleaners, can significantly simplify the task of cleaning your shower. Here’s how you can achieve a pristine shower drain using our expert advice.

How to Clean Your Shower Drain: A Guide from Flooring Supply Shop

silver quartz linear

Step 1: Preparation is Key

Starting your mission to unclog that pesky shower drain? First off, do you have the right toolkit at hand? Picture this: you, geared up with protective gloves to shield your hands from anything yucky or harmful. Got them? Great! Now, how about a screwdriver? You might need one to tackle the shower drain cover. If it’s something like the Quartz Linear Shower Drain Brushed Stainless – Tile Insert 28, you’re in luck because it’s made for hassle-free access.

But what about the stubborn clogs lurking beneath? That’s where a trusty plunger and a drain snake come into play, ready to dive deep and wrestle those clogs into submission. And let’s not forget our trio of cleanliness: white vinegar, baking soda, and boiling water. These aren’t just for your kitchen; they’re your chemical cleaning squad for blasting through blockages.

Feeling a bit overwhelmed? Don’t worry! Flooring Supply Shop has got your back with shower drainage kits that bundle everything you need. Why juggle tools when you can get it all in one go? So, ready to turn this clogged drain adventure into a victory story?

Remove the Shower Drain and Wash it

Step 2: Remove the Drain Cover

Gaining access to the clog involves removing the shower drain cover, which may be secured with screws. The design of our Quartz Linear Shower Drain facilitates easy removal, ensuring that you can get to the task without fuss. Ensure the area around the drain is clean to avoid any slipping hazards as you work.

Water and Bubbles on the floor

Step 3: Eliminate Visible Debris

With the cover off, it’s time to address the visible debris clogging your drain. Hair and soap scum are often the main offenders. Don protective gloves and use a bent wire hanger or a drain snake to extract these materials carefully. This manual removal is crucial for alleviating immediate blockage and allowing any liquid solutions to penetrate deeper into the drain.

Silver Shower Drain

Step 4: Boil Water for a Hot Water Flush

Boiling a kettle of water and pouring it down the drain serves as an initial effort to melt away grease or soap that’s lining the pipes. This step is simple but effective, utilizing the natural solvent power of hot water to start the unclogging process and pave the way for more intensive cleaning.

Baking soda as shower drain cleaner

Step 5: Deploy the Baking Soda and Vinegar Mixture

Introduce a cup of baking soda directly into the drain, followed by an equal measure of white vinegar. The reaction between these two household ingredients produces a vigorous fizzing action, helping to dislodge any residual debris clinging to the pipes. Allow this mixture to sit for about 10 minutes, giving it ample time to break down the blockages.

Step 6: Final Flush with Boiling Water

Following the chemical reaction, another round of boiling water acts as a thorough rinse. Pour it carefully down the drain to wash away the loosened debris and cleaning solution. This step is critical for ensuring that the clog is completely cleared and that water can flow freely once again.

Bamboo Teak Shower

Step 7: Proactive Prevention

Preventing future clogs is just as important as clearing the existing ones. A simple yet effective measure is to install a drain plug that catches hair and other potential clog-causing debris before they enter the drain. Regular maintenance, including periodic cleaning with the above steps, will keep your shower drain functioning properly and reduce the likelihood of slow draining or the need for professional plumbing services.

Bronze Shower Drain

How To Easily Unclog a Clogged Shower Drain?

Unclogging a clogged shower drain can often be done with simple household items, avoiding the immediate need to call a plumber. Start by removing the shower drain cover, which may require unscrewing or simply lifting off, to access the drain. Once open, visually inspect for any visible debris, such as hair or soap scum, that can be manually removed. Wear gloves, and use a bent wire hanger or a small drain snake to fish out the blockage. This can be surprisingly effective at removing the bulk of the clog.

Next, prepare a natural but powerful solution by pouring a cup of baking soda directly down the drain, followed by an equal amount of white vinegar. The mixture will fizz and bubble, working to dissolve any remaining grease or buildup. Allow this reaction to work for about 10-15 minutes, then flush the drain with boiling water. The hot water helps to rinse away the loosened debris and any residual cleaning solution, often clearing the clog completely.

For persistent or recurrent clogs, repeating the process or using a plunger to apply pressure and dislodge the blockage might be necessary. If these steps don’t resolve the issue, it may be time to call a professional plumber to assess and fix the problem.

Styled Silver Shower Drain

How To Keep Your Shower Drains Clean?

Keeping your shower drain clean is essential for preventing clogs and ensuring the water flows freely, which helps maintain a hygienic and pleasant bathroom environment. Here are effective steps to keep your shower drain clean:

1. Regular Flushing with Hot Water

Flush your shower drain with hot water once a week to prevent clogs caused by soap residue and oils. The heat can dissolve minor accumulations before they become bigger issues.

2. Baking Soda and Vinegar Routine

To maintain cleanliness and clear minor blockages in your drain, use a natural cleaning solution of baking soda and vinegar every month. Pour half a cup of baking soda and half a cup of vinegar down the drain. Cover the drain to keep the reaction contained and wait for 10-15 minutes. Then, flush the drain with boiling water to clear out the loosened debris.

3. Use a Hair Catcher

A significant cause of shower drain clogs is hair. Installing a hair catcher over the drain can capture hair and other debris before they enter the drain. Clean the catcher regularly to ensure it continues to protect your drain effectively.

4. Clean the Drain Cover Regularly

Clean your shower drain cover monthly with a brush and mild cleaning solution to prevent blockages and odors. This also helps you visually inspect the drain for any problems.

5. Avoid Chemical Drain Cleaners

Chemical drain cleaners can damage plumbing over time due to their harsh chemicals, which can corrode pipes. Natural alternatives, like baking soda and vinegar, are safer.

6. Professional Inspection

It might be time for a professional inspection if you notice slow draining despite regular maintenance. Plumbers can identify and resolve deeper issues that are inaccessible or easily fixed with home remedies.

7. Educate Household Members

Teach your household to avoid putting excessive soap bits, hair, and small objects down the shower drain. This reduces the risk of clogs.

What is a Shower Slope Kit and Why it is Important?

When undertaking bathroom remodeling projects, ensuring proper water drainage is paramount. One essential element that helps achieve this effectively is a shower slope kit. This specialized system ensures the shower floor is properly sloped, allowing water to drain efficiently and preventing water accumulation and potential damage. Here’s everything you need to understand about shower slope kits, including why they’re crucial, available types, selection tips, and purchase options.

What is a Shower Slope Kit?

A shower slope kit is a specifically designed system used during shower floor installations to create the perfect slope required for effective water drainage. It typically consists of pre-pitch sticks or float sticks, crafted from materials such as high-impact plastic with a reinforcing design, to establish a precise gradient directing water toward the drain. These kits eliminate the guesswork often associated with manually forming slopes, providing a foolproof solution even for those without advanced skills in bathroom installations.

Common components of shower slope kits include pitch sticks, extended sticks, and detailed instructions to facilitate easy installation. Most pitch sticks are lightweight and non-rotting, ensuring long-lasting performance. They often come molded of high-impact plastic, reinforcing their durability and efficiency in moisture-rich environments.

extended shower slope kit

Why is a Shower Slope Kit Important?

Proper water drainage in showers is critical to prevent water pooling, mold growth, and structural damage. Without a properly sloped shower floor, water tends to accumulate, creating slippery surfaces and increasing the risk of water seeping into walls and subflooring.

A shower slope kit creates the proper slope needed without requiring extensive plumbing or construction skills. This system significantly simplifies the installation process, making it accessible even for DIY enthusiasts. With built-in pitch forms, these kits ensure consistent and accurate slopes every time, significantly reducing installation errors.

A shower slope kit also protects bathroom integrity by preventing moisture-related issues. Efficient drainage keeps surfaces dry, minimizes mold and mildew growth, and extends the longevity of bathroom materials.

shower slope kit

Types of Shower Slope Kits

Several types of shower slope kits are available, each designed to suit different installation requirements:

1. Pre-Pitch Shower Kits:

These kits come with pitch sticks and reinforcing plastic structures used beneath the shower pan liner. Their purpose is to form an initial slope under the liner, ensuring water moves toward the drain effectively. Pre-pitch sticks are typically sold 4 per package and are easy to handle, being lightweight and non-rotting.

2. Quick Pitch Kits:

Quick pitch kits feature pitch sticks installed above the pan liner and beneath the shower flooring material. These sticks typically have built-in slopes, which quickly create an accurate gradient. Quick pitch systems are straightforward to use, reducing installation complexity, and require no advanced skills.

extended slope kit

3. Extended Sticks Kits:

Extended sticks are ideal for larger showers requiring longer slope gradients. These kits include elongated pitch sticks, tapered x 36 inches, capable of accommodating more extensive shower floor areas effectively.

Each of these kits comes complete with instructions included, ensuring an easy and precise installation process regardless of the chosen type.

How to Choose the Right Shower Slope Kit

Choosing the ideal shower slope kit involves considering several key factors:

Shower Size and Shape:

The dimensions and design of your shower area significantly impact your choice. Smaller showers benefit from standard quick pitch kits, while larger areas may require extended sticks to manage drainage across wider surfaces properly.

Installation Complexity:

Evaluate your installation experience and comfort level. If you’re not skilled in plumbing or construction tasks, opt for quick pitch kits featuring built-in slopes and comprehensive instructions. These kits offer straightforward installations, minimizing errors.

Material Durability:

Ensure the pitch sticks are molded of high-impact plastic, providing longevity and resistance to moisture and damage. Kits made from durable, lightweight, and non-rotting materials are superior for bathroom environments where moisture exposure is constant.

Compatibility:

Verify that the chosen kit aligns with your shower pan liner and flooring materials. Compatibility ensures seamless integration, optimal performance, and maximum water drainage efficiency.

By assessing these factors, you can confidently select the perfect shower slope kit that meets your specific project requirements and ensures durable, effective water management in your bathroom.

flooring supply logo

Where to Buy a Shower Slope Kit?

Selecting a trusted retailer is crucial when purchasing your shower slope kit to guarantee product quality, accurate guidance, and superior customer service. Flooring Supply Shop stands out as an exceptional choice for acquiring reliable shower slope kits and accessories.

Flooring Supply Shop offers an extensive range of shower slope kits, including pre-pitch, quick pitch, and extended stick varieties. Each product is constructed from high-quality materials such as reinforced lightweight plastics, ensuring both durability and ease of use. The kits sold here include comprehensive installation instructions, facilitating easy setups for both DIY enthusiasts and professional contractors.

By choosing Flooring Supply Shop, you gain access to expert advice and a robust selection of bathroom remodeling products that will significantly enhance your shower installation experience. Their kits are specifically designed to create the perfect slope effortlessly, ensuring a professional-quality result every time.

For optimal shower drainage and a reliable installation experience, visit Flooring Supply Shop at to browse and select the ideal shower slope kit for your needs.

Investing in a shower slope kit is a wise decision for any bathroom renovation project. It simplifies installation, ensures efficient water drainage, and significantly reduces potential moisture-related issues. Whether opting for pre-pitch, quick pitch, or extended stick kits, each offers unique benefits tailored to various shower designs and installation complexities.

Understanding these kits, their importance, the types available, and how to select the appropriate one ensures your bathroom remains both functional and aesthetically pleasing for years to come. For quality shower slope kits and excellent customer support, trust Flooring Supply Shop as your reliable partner in bathroom remodeling.


Learn what a shower slope kit is, why it’s essential for proper drainage and waterproofing—and feel free to save this handy infographic for your next bathroom project.

Types of Shower Slope Kits

Health Benefits of Steam Shower

Health Benefits of Steam Shower

Steam showers are an increasingly popular addition to modern bathrooms, offering a spa-like experience in the comfort of one’s own home. As an excellent tool for relaxation, stress relief, and overall health benefits, steam showers have become a must-have feature for many homeowners. In this article, we will dive deep into the world of steam showers, exploring their benefits, installation process, maintenance, and everything you need to know before investing in one for your home.

The Benefits of Steam Showers

1. Relaxation and stress relief: Steam showers offer a tranquil oasis where you can escape the stresses of everyday life. As the warm, soothing steam envelops your body, it helps to ease tense muscles and promote relaxation. This serene environment is perfect for meditation, mindfulness, or simply unwinding after a long day. By incorporating a steam shower into your daily routine, you can effectively reduce stress levels and improve your overall well-being.

2. Improved circulation: The heat generated in steam showers causes blood vessels to expand or dilate, promoting better blood flow throughout the body. Improved circulation can help to alleviate minor aches and pains, reduce inflammation, and speed up the healing process for injuries. Additionally, the increased blood flow can help deliver essential nutrients and oxygen to your muscles and organs, promoting overall health and vitality.

3. Respiratory health: Steam showers have therapeutic benefits for those suffering from respiratory issues such as allergies, asthma, or sinusitis. The warm, moist air generated in the shower can help to open up airways, making it easier to breathe and reducing congestion. It can also soothe irritated respiratory passages, providing relief from coughs, colds, and other respiratory ailments. Incorporating steam showers into your self-care routine can support long-term respiratory health and enhance your breathing capabilities.

4. Skin health: Steam showers are a powerful ally in maintaining healthy, radiant skin. As the steam opens up your pores, it allows for a deep and thorough cleanse, helping to remove impurities and excess oil. This process can reduce the likelihood of acne breakouts and promote a clearer complexion. Furthermore, the increased blood flow triggered by the heat nourishes your skin cells with oxygen and essential nutrients, providing a natural glow and promoting skin cell regeneration for a more youthful appearance.

5. Detoxification: Sweating is a natural detoxification process that helps your body eliminate toxins and impurities. Steam showers stimulate your body to sweat more profusely in response to the heat, effectively flushing out toxins through the skin. This detoxifying effect can contribute to a healthier immune system, improved digestion, and enhanced metabolic function. By incorporating steam showers into your wellness routine, you can support your body’s natural detoxification processes and boost overall health.

6. Enhanced immune system: Regular steam shower sessions can help boost your immune system by increasing white blood cell production. As your body’s temperature rises during a steam shower, it mimics a fever-like state, prompting your immune system to respond more aggressively against potential infections or viruses. This heightened immune response can help you stay healthier and recover more quickly from illnesses.

7. Joint and muscle pain relief: The heat from steam showers has a therapeutic effect on sore muscles and achy joints. The increased blood flow and warmth can help reduce inflammation and relax muscles, providing relief for conditions such as arthritis, fibromyalgia, and other chronic pain disorders. Incorporating steam showers into your pain management routine can offer a natural, drug-free way to alleviate discomfort and improve your overall quality of life.

8. Better sleep: Many people find that steam showers help improve their sleep quality, particularly when used in the evening before bedtime. The combination of heat, relaxation, and stress relief can make it easier for you to fall asleep and enjoy a more restful night’s rest. By establishing a steam shower routine before bed, you can promote healthier sleep patterns and potentially reduce the need for sleep aids.

9. Enhanced mood and mental well-being: The relaxing atmosphere of a steam shower can have a positive effect on your mental health, helping to reduce anxiety and lift your spirits. The heat and steam can stimulate the production of endorphins, the “feel-good” hormones that contribute to a sense of happiness and well-being. As a result, incorporating steam showers into your self-care routine can offer a natural way to combat stress, anxiety, and depression.

10. Increased flexibility and mobility: The heat from steam showers can help improve your flexibility by warming up your muscles and connective tissues. As your body becomes more limber, you may find it easier to perform daily activities or engage in exercise routines that require flexibility, such as yoga or Pilates. By regularly using a steam shower, you can support better joint mobility, reduce the risk of injury, and improve your overall physical performance.

Installation Considerations

1. Space requirements: A steam shower requires a dedicated, enclosed space to prevent the steam from damaging other areas of the bathroom. The space should be properly sealed and insulated to maintain the heat and humidity levels.

2. Steam generator: A steam generator is essential for producing the steam and should be sized according to the volume of the shower enclosure. Choose a reputable brand to ensure the longevity and reliability of your steam shower system.

3. Ventilation: Adequate ventilation is necessary to maintain air quality and prevent excessive humidity buildup. Installing an exhaust fan and an air gap in the shower door can help with ventilation.

4. Waterproofing: The steam shower enclosure should be properly waterproofed using suitable materials such as cement backer boards and vapor barrier membranes to prevent water damage.

5. Professional installation: Hiring a professional contractor or plumber with experience in steam shower installations is highly recommended to ensure the system is installed correctly and safely.

Maintenance Tips

1. Regular cleaning: Clean your steam shower enclosure to prevent mold and mildew growth after each use. Use non-abrasive cleaning products that are safe for your enclosure’s materials.

2. Inspect seals and gaskets: Periodically inspect the seals and gaskets around the door and steam generator to ensure they are in good condition and functioning properly.

3. Drain the steam generator: To prevent mineral buildup, regularly drain and flush the steam generator according to the manufacturer’s instructions.

4. Replace parts as needed: If you notice any issues or malfunctions, replace the necessary parts promptly to maintain the safety and efficiency of your steam shower.

Steam showers are an excellent investment for those looking to add a touch of luxury and wellness to their bathroom. By understanding the benefits, installation process, and maintenance requirements, you can make an informed decision and enjoy a spa-like experience in the comfort of your own home. So, go ahead and indulge in the steamy affair of a steam shower – your body and mind will thank you.

Frequently asked questions (FAQ)

Q1: What are steam showers?

A1: Steam showers are enclosed shower units that produce steam by heating water with a steam generator. They provide a relaxing, spa-like experience, offering numerous health and wellness benefits, such as stress relief, improved circulation, respiratory health, skin health, and detoxification.

Q2: Are steam showers worth it?

A2: Steam showers can be a valuable addition to your home, offering a luxurious and therapeutic experience. They can help improve your overall well-being by providing relaxation, stress relief, and various health benefits. However, the worthiness of a steam shower ultimately depends on your personal preferences, budget, and available space.

Q3: Do steam showers help coughs?

A3: Steam showers can potentially help alleviate coughs by providing warm, moist air that can help soothe irritated respiratory passages and loosen mucus. This can be especially helpful for those with colds, allergies, or sinus issues. However, it is essential to consult with a healthcare professional before using a steam shower for cough relief, as the underlying cause of the cough may require medical attention.

Bathroom Accessories | Flooring Supply Shop Blog