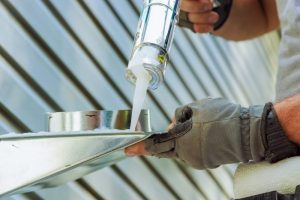
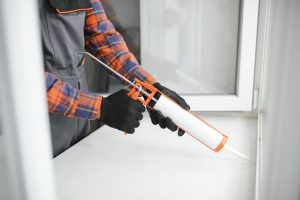
Caulk is a flexible material used to seal gaps in various structures and surfaces, ensuring they are waterproof, dustproof, and sometimes even air-tight. The drying time for caulk can vary widely depending on the type used, the conditions under which it is applied, and the specifics of the job. Understanding these variables can help ensure the best results for any caulking project.
Types of Caulk and Their Drying Times

- Silicone Caulk
Silicone caulk is favored for its strong adhesion and flexibility. It’s particularly useful in areas exposed to extreme temperatures and moist environments, making it ideal for bathrooms and kitchens.
- Skinning Time: Silicone caulk typically begins to skin over in about 10 to 20 minutes.
- Curing Time: Full cure can take anywhere from 24 to 48 hours. The caulk must not be exposed to water or manipulated during this time.
- Acrylic Latex Caulk
Also known as painter’s caulk, acrylic latex is easier to work with and paint over than silicone, making it a good choice for sealing gaps in windows, doors, and baseboards.
- Skinning Time: This caulk will skin over in about 15 to 30 minutes.
- Curing Time: It usually takes 1 to 2 hours for acrylic latex caulk to become dry to the touch, but a full cure might take up to 24 hours.

- Polyurethane Foam Caulk
This type of caulk is best used for filling larger gaps. It expands after application, providing excellent insulation and sealing properties.
- Skinning Time: Polyurethane foam begins to skin in about 5 to 10 minutes.
- Curing Time: It can take 12 to 24 hours to fully cure, depending on humidity and temperature.
- Butyl Rubber Caulk
Butyl rubber is highly durable and best suited for outdoor conditions. It is often used to seal metal, masonry, and roofing materials.
- Skinning Time: This caulk skins over in about 2 to 24 hours.
- Curing Time: Full curing can take up to two weeks, particularly in cooler or less humid conditions.
Factors Influencing Drying Time
Temperature and Humidity
Higher temperatures and higher humidity levels can accelerate the curing process, whereas lower temperatures and lower humidity will slow it down. Most caulks are best applied when the temperature is between 40°F and 80°F.
Application Thickness
Thicker applications of caulk will take longer to cure. It’s important to apply caulk in thin, even lines unless the job specifically requires a thicker bead.
Air Circulation
Good ventilation can help reduce the drying time. Air movement around the caulked area helps to dissipate moisture and accelerates the curing process.

Tips for Effective Caulking
- Surface Preparation: Ensure surfaces are clean, dry, and free of old caulk or paint for the best adhesion.
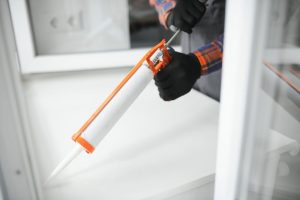
- Correct Application: Cut the tip of the caulk tube to match the size of the gap you are filling. Apply smoothly and steadily.
- Tooling: Smooth the caulk with a wet finger or tool to ensure it fills the gap completely and provides a clean finish.
- Timing: Avoid exposing the caulk to moisture before it has fully cured. Respect the manufacturer’s instructions regarding skinning and curing times.
Understanding the characteristics of different types of caulk and the factors influencing their drying times is crucial for a successful sealing project. Whether you’re working indoors or outdoors, choosing the right caulk and applying it under optimal conditions will help achieve the best seal and finish.

What are the things I should avoid doing to make the caulk dry faster?
When trying to dry caulk faster, there are several practices you should avoid to ensure the integrity and effectiveness of the seal:
- Do Not Use Heat Guns or Hair Dryers: Applying direct heat with devices like heat guns or hair dryers can cause the caulk to dry unevenly or crack. It may also compromise the adhesive properties of the caulk.
- Do Not Expose to Water: Especially relevant for silicone and other non-water-based caulks, exposing the caulk to water before it has fully cured can prevent it from setting properly, leading to weakened sealing.
- Do Not Apply in Extreme Temperatures: Avoid caulking in temperatures that are too cold or too hot, as most caulks have optimal application temperature ranges. Extreme temperatures can affect the curing time and final durability.
- Do Not Apply Thick Layers: While it might be tempting to apply caulk thickly to speed up the job, thicker layers take much longer to dry and can lead to uneven curing and potential cracking.
- Do Not Disturb the Caulk: Once applied, it’s important to allow the caulk to rest undisturbed during the curing process. Touching or pressing on the caulk can misshape it, break the seal, or extend drying times.
Frequently Asked Questions
Q: How long does silicone caulk take to dry?
A: Silicone caulk typically skins over within 10 to 20 minutes and fully cures in 24 to 48 hours. During the curing period, it is important not to expose silicone caulk to water or touch it to ensure optimal adhesion and waterproofing properties.
Q: Can I speed up the drying time of caulk?
A: To expedite caulk drying time, maintain a warm temperature and ensure good air circulation in the area. Using a fan or dehumidifier can help. However, it’s important not to rush the process beyond the manufacturer’s recommendations.
Q: Is it necessary to remove the old caulk before applying new caulk?
A: Yes, for the best results, you should remove all traces of old caulk before applying new caulk. This ensures that the new caulk adheres properly and provides a seamless, waterproof seal. Clean the surface thoroughly and let it dry completely before reapplying caulk.