 |
|
Floor Underlayment
- Proper backing for the tiling surface is very important. Backing for the tile floor may consist of exterior grade heel-proof plywood, lauan underlayment panel, mortar based backer board, or exterior plywood underlayment. It should be at least 11/4" thick over a minimum of 16" on center floor joists. Otherwise a "flex" can cause tile to pop out of place.
- If you are installing a new underlayment, it's recommended that you staple polyethylene plastic on top of the subfloor before you install the underlayment to ensure protection from water penetrating down to the subfloor.
- If applying a sheet of plywood underlayment, leave a slight gap between panels and about 1/4" along the edges to allow for slight expansion and contraction.
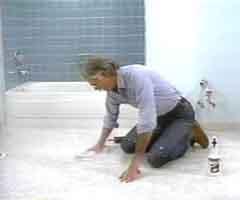
You can fill low areas with this quick drying patching compound using a wide application blade to create as flat a surface as possible.
- Stagger the joints of the underlayment in a brick-joint fashion and be sure that underlayment seams do not fall directly over existing subfloor seams. With whatever underlayment you use, except the backer board, slightly countersink or "dimple" all the nails.
Whatever you do, don't ever use particle board, flake board, or masonite as underlayment for ceramic tile and be sure that your surface is dry and clean.
- If you use a mortar based backer-board, seal the joints and seams with the proper joint compound and then seal with a moisture resistant bonderizer.
- You can lay tile over concrete, just make sure to give it a minimum of 28 days to cure. Vinyl tile can also be applied directly over existing tile or vinyl unless the vinyl is sponged backed. If the vinyl is glossed, you'll need to de-gloss it to get a proper bond.
- Before you start, when you are checking your materials, check the doorways to determine the tiles you'll need to finish the exposed edges properly. For example, if your finished floor level is going to be higher than the adjoining room or hallway, you should get bull nose tile to create a smooth transition. If the floor meets a carpeted edge where the levels are pretty much the same, then a regular square edged tile will probably be fine.
|
Ceramic Floor Tiling 4 - Layout
|
Establishing the Layout Lines:
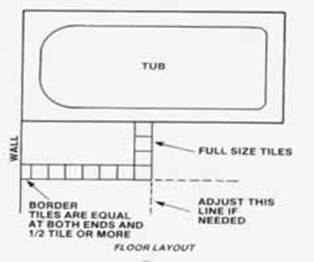
It is critical that you establish accurate working lines. You are creating a kind of a map to follow to assure an attractive, quality job. All working lines should be bold and easy to see. What you are seeking is a layout that enables you to lay your tile so that there will be full size tiles in high visibility areas, and all edge (border) tiles are at least 1/2 tile or more.
First, make a dry-run for the layout by running dry tiles out from the two most visible walls to see which would work best with your room.
If the tiles at the end of each row (border tiles) are less than half a tile width, adjust the row by moving it the width of half a tile. This will assure you that all the cut tiles will be more than half a tile width.
|
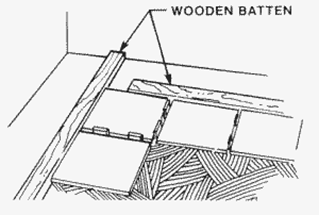
Also, check to see that the corner that you are working off is square. If it isn't, tack battens to the floor that are squared accurately a tile width from the corner. Use a framing square and chalk line for this process. The line closest to the wall is established by snapping a line one tile length away from the wall along both walls that you're working off of. Then snap another line parallel to it that is the thickness of two grout lines. (This way you are allowing for the grout line along the wall and for the next row of tiles.)
Then nail battens made from 1x2's or 1x3's along that working line so you have a firm position to start running our tiles. Make sure your battens form a right angle and are straight.
Later, once the tiles are laid in the field, remove the battens and tile along the edges, cutting the tiles if necessary. REMEMBER, when you are cutting tiles always leave room for the grout line. |
Ceramic Floor Tiling 5 - Installation
|
First, double check your supplies. Once you roll up your sleeves and are ready to go to work you want to make sure that you have everything that you are going to need.
Do the colors of the tile match? Some discrepancy can be attractive, but that's a personal design choice. Sometimes it's a good idea to pull tiles out of different boxes as you work so any slight discrepancy is integrated into the overall look of the job. Do you have enough quarter round tile for the edges?
Is the grout the right color?
Spreading the adhesive
If you are installing tile in an area that is going to be exposed to water conditions, use a mastic that is water-proof so that it will hold up well. This is very important. If you are applying floor tile in areas not exposed to water, you can use a mastic that is not water-proof.
Epoxy adhesives are also available, but their drying times can be difficult to control. They are more appropriate in areas where high impact strength and chemical resistance are required, like for a darkroom, perhaps. |
- Before you apply the adhesive, carefully read the manufacturer's instructions for drying time so you don't spread any more than you can work with before it sets up. Usually you want to spread enough mortar for 30-40 minutes work.
- Spread the adhesive on the floor or countertop using the flat side of the applicator. Once you've applied adhesive on a wide area, flip the trowel around to the notched side, run it at a 45 degree angle to create wide grooves.
Note: Use a notched trowel that is notched deeply enough so that the peak of the adhesive should be as thick or nearly as thick as the thickness of the tile. The valley will only show a thin film.
- When applying the adhesive, be careful not to completely obscure your working lines.
- Only spread as much adhesive as you can work with before it sets up.
|
Setting the tile
- Gently twist the tile into place. Never slide it.
- Use spacers between the tiles to maintain consistent lines if your floor tiles do not have spacing lugs built into the tiles like many standard bath tiles do. There are some types of spacers available that will allow you to leave them permanently and simply grout over them.
- Lay the tiles row by row, cutting the tiles as needed when you get to the end of a row. It's a good idea to snap a chalk line for every row as you go so that you are always working off a straight line. Snap the chalk line about an inch away from the edge of the tile so that the adhesive doesn't obscure your line.
- As you work, take a piece of padded wood that has been covered with an old towel or something protective and beat the tiles to be sure you are adequately seating the tiles in the adhesive. The piece of wood should span at least two or more tiles.
- Continue setting the tiles and spacers until you reach the other end of the room.
|
Ceramic Floor Tiling 6 - Cutting and Trimming
|
Cutting Tile - Straight Cuts
1. As you tile into the corners you'll need to be cutting tile as you go.
2. Measure accurately with a tape measure.
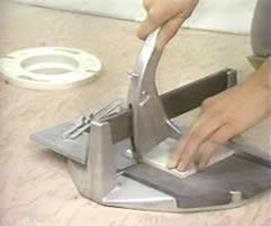
3. Most tile dealers can lend you a simple tile cutter. You can also rent a wet saw from your local equipment rental center.
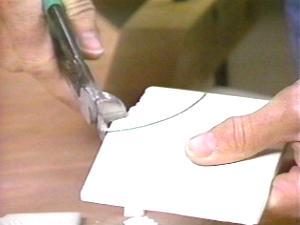
4. When cutting with a non-power tile cutter, score the tile only once. Multiple scores will only dull the blade and create jagged edges on the tile. Place the breaking wings, located at the bottom of the handle, about 1/2" from either edge of the tile and slowly but firmly press down on the handle until the wings break the tile. If needed, smooth any rough edges with a tile sander.
Cutting Shapes
 1.Whenever you are cutting any tiles, be sure to allow for the 1/8" grout line when getting your measurements. 1.Whenever you are cutting any tiles, be sure to allow for the 1/8" grout line when getting your measurements.
Note: Cut tiles to fit around pipes and faucets after all the field tiles are laid.
2.Here are a few different ways to make more complicated cuts:
A) With tile nippers, cut tiles to irregular shapes. Scoring cutoff line with a micro cutter helps. You might need to cut a tile in two so that a tile
wraps around the plumbing.
B) With a wet tile saw (rented from your local equipment rental center) you can cut the tile with a series of cuts and then go over it with the blade to smooth it out.
If you are making a lot of complicated cuts, it may be worth it to rent a diamond cut-off wheel like this at an equipment rental center or your tile dealer.
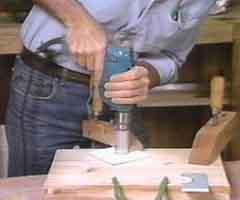
3. You can also use a saber saw with a carbide blade or, for small holes for plumbing pipes, you can use a tile cutting attachment for your drill.
Installing the Trim Tiles:
All the baseboard of the floor or backsplash for the countertop need to be finished off with trim tile. To do this, simply butter the adhesive on the back of the tile and stick onto the wall in the correct position.
Note: Make sure to clean out any debris that might have fallen into the joints before the adhesive dries and wipe off any excess adhesive. We don't want anything to interfere with the grouting. Now, we'll let the tiles sit like this for 24 hours. |
Ceramic Floor Tiling 7 - Grouting
 |
To prevent some cement based grouts from drying prematurely, wash white-bodied and soft red-bodied tiles before grouting. These types of tiles tend to be a lot more porous and can draw liquid from the grout and make it weak.
For standard 4 1/8" tiles where the joints are very narrow, we're using a non-sanded grout. For any other grout joints with other types of tiles, we would use a sanded grout, which holds up better when the grout lines are wider.
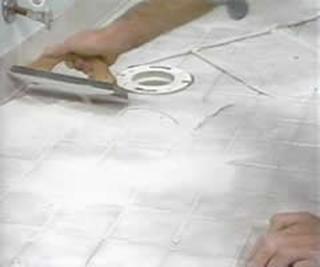
The easiest way to apply grout is with a rubber-faced float or a squeegee, although you can do it with your finger and a large sponge. An old toothbrush is handy too to help work the grout into the joints.
Note: Mix the grout with a mixture of 50/50 water and grout fortifier. This will ensure a waterproof grout job. The following are the steps in applying grout:
 1. Apply grout to the surface of the tile, spreading it with the float or squeegee and forcing it into the joints. It is critical that the joints be completely filled so that there are no bubbles or gaps. 1. Apply grout to the surface of the tile, spreading it with the float or squeegee and forcing it into the joints. It is critical that the joints be completely filled so that there are no bubbles or gaps.
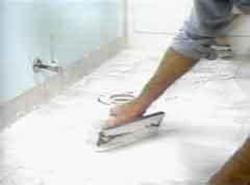
2. Scrape the excess grout off by wiping diagonally across the tiles with your float or squeegee.
3. With a cleaned out sponge, wash out with clear water and wipe away any remaining grout.Continue to rinse and wring out the sponge until the joints are smooth and level with the tiles.
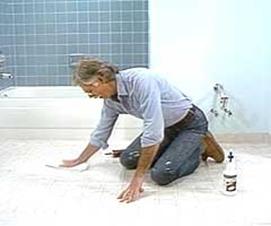
4. Let the tiles dry out. After about 30 minutes, a hazy grout film will appear. Wipe that away with a soft cloth. You can use the end of a toothbrush handle to tool the joints and clean the intersections clean away and your done.
Here are other Ceramic tile floors that you can also install in your home after you have read this ebook.
|
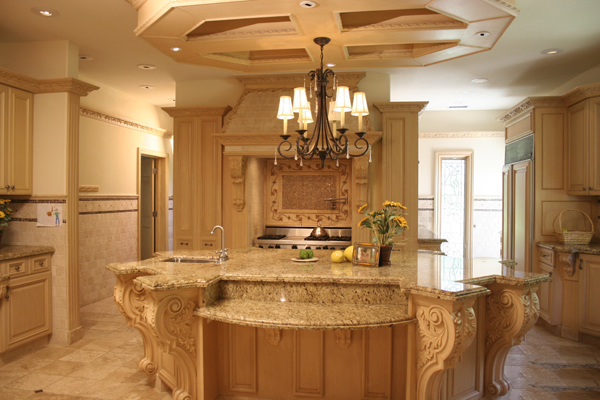
Kitchen Floors
 |
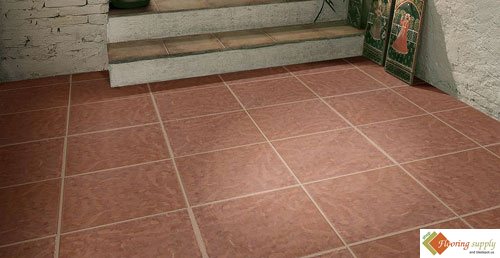
Living Room, Bedroom Floors
 |
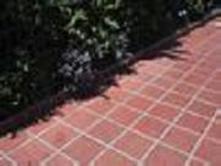
Outdoor Side Walk Floors etc..
 |
You can purchase this book or many others by this Author from his web store
© 2004-2007 ultimatemallstore.inc copyright protected |
|