Crucial Do It Yourself (DIY) Home Improvement Tips

September 5, 2017

Crucial Do It Yourself (DIY) Home Improvement Tips

Flooring Supply Shop

The Home Improvement industry is steadily booming in India. People are now willing to spend on improvising their households. They feel that their home is a reflection of themselves. According to stats, there has been a considerable rise of house renovations and improvements in the year 2016 and expected to rise in 2017. Almost 75% is spent on furniture and fixtures while 25% in home decor.

Home improvement cannot be done haphazardly, it requires proper planning.  Everything needs to be organized which would include even the worst case scenarios and their solutions. Some of the basic crucial steps for home improvement tools are:

1.           Plan

Planning is a crucial and most important step for home improvement. One needs to have an idea regarding the areas that require improvement. Log all the details in a dairy, including measurements, your preferred layout and what you visualize for your space. Also, understanding your space is essential. Your ideas and layouts should be feasible to the measurements. Researching on ideas is vital.

2.           Budgeting

The second important step is budgeting. Every improvement or restoration will require an estimated expense. Planning the budget would help one understand which areas require more resources and your money can be managed more effectively.  Always try and keep a buffer of 15-20% for unexpected expenses.

3.           Prioritizing

After the crucial step of planning, you should have a list of areas that would require improvements. Certain areas may require immediate attention to prevent damage. Hence, prioritizing comes into the picture. Immediate restorations can decrease the level of severity and cost at that instance. If certain restorations are avoided now, they could increase the overhead cost next time. Prioritizing will help in effectively managing time and budget. For prioritizing, the POSEC method can be used.

POSEC Method stands for Prioritizing by Organizing, Streamlining, Economizing and Contributing. It works as:

•            Prioritizing responsibilities according to priority and available time.
•            Organizing according to priorities
•            Streamline tasks that need to be done (even if you don’t like them)
•            Economize tasks that are not as important
•            Contribute to help the contractors, if hired.

4.           Pinterest and YouTube is your friend

Researching your projects will help you dodge certain mistakes. Pinterest and YouTube are the places where one can find many Do-It-Yourself (DIY) guides. Also, try reading certain books and magazines related to home improvement. On Pinterest, you can browse through numerous images to get practical ideas for your household.

5.           Find the right contractor

One needs to find a reliable Contractor Directory for handling their household projects. For hiring a contractor, one needs to do research and also perform background checks.
Certain steps for hiring a contractor could be:

•            Asking for peer feedbacks
•            Research on the contractor
•            Ask for references
•            Get quotes from various contractors and tally

6.           Save Money

Saving money on certain improvement projects would help one to invest in other minor home improvement projects. Spending it wisely is the key. More should be spent on replacing items that are hard to replace by yourself. Splurge on items that are beneficial to you and the household.
A good idea is to go and scout for your own furniture. This would help you get bargains and select your choice. Another option is checking for discounts and order over the internet. One can also save money by doing certain tasks by themselves by watching YouTube videos.

7.           Match your home décor with furniture

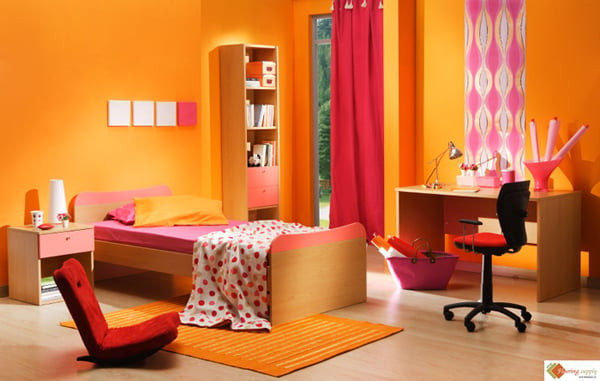
Choosing the colour for your wall or furniture is up to you. Nowadays, people don’t always prefer matching colour. They like to add a splash of colour even at home. So, the colour choice is basically decided by you. Also, another option would be to mix designs and provide the house with an elegant look.

8.           Plan for future upgrades

Through planning, you would know exactly where future improvements can take place. This would help you to analyse and save along the way. These future upgrades should be integrated with minimalistic changes to the current design.

9.           Consultation

Home improvements need to be perfect as you invest a lot of money. In certain instances, feel free to consult licensed tradespeople. Any work related to plumbing, electrical or structural changes should be consulted with a professional before undertaking. You can even hire an architect or designer for the initial layout sketch.

10.        Follow the instructions

While doing any Do-It-Yourself (DIY) project, keep all the right information handy. Follow all the instructions carefully to get the right outcome in the end. Also, ensure that you have the correct tools present with you. Ensure that you have complied with the appropriate safety measures.

Serene steam, royal drain
Flooring Supply Shop

Author’s Bio
Akshay works as an Interior Designer with Lalco Interiors and he is in love with his job. Thinking up interesting home décor ideas and helping clients implement them is what makes him tick. You can catch up with Akshay and his team and indulge in one of their beautiful home décor pieces for your home at Lalco Interior.

The post Crucial Do It Yourself (DIY) Home Improvement Tips first appeared on Flooring Supply Shop Blog.

4 Reasons to Buy Heated Flooring

March 8, 2017

If you’ve ever experienced the feeling of stepping onto a cold tile floor after a warm shower, you will know it can be a bit of a shock to the system. Change that cold tile floor to a heated floor and the soles of your feet are delighted by a sensation like no other. Here are just four reasons why buying heated flooring from Flooring Supply Shop is one of the best investments you can make for your home.

Our Heated Floors Are Extremely Affordable

While the cost of installing heated flooring was once a very expensive project, many heated floors are now electrically powered and what’s more, you can install them yourself. EasyHeat Warm Tile Elite Mats are super thin floor mats that warm stone and tile floors and are a fraction of the price of traditional heated floors. They are also easier and quicker to install than conventional floor warming mats. EasyHeat Warm Tile Elite Mats are suitable for installation in bathrooms, kitchens, entries, sunrooms and more.

Our Heated Floors Use Less Energy

Our Radiant Floor Heating systems are proven to reduce energy usage compared to other forms of heating, keeping energy costs to a minimum while also delivering exceptional comfort. EasyHeat products in particular, also have extremely low EMF and such levels are comparable to standard household products such as televisions, mobile phones and refrigerators.

Our Heated Floors Are Suitable For Most Rooms

Although typically installed in the bathroom, the great thing about heated flooring is that it can be installed in almost any other room, providing they are fitted with appropriate flooring. If you have hardwood floors in one of your rooms for example, the changed in temperature may cause gaps in the wood. Choosing porcelain tiles, for example, means you can install heated flooring without any concerns and without sacrificing styles. Many people install heated floors in kitchens, bedrooms and basements, where it tends to get drafty.

Our Heated Floors Don’t Make Any Noise

One of the great things about the heated flooring we sell is its ability to deliver heat without noise. Both SunTouch Radiant Floor Heating and EasyHeat Radiant Floor Heating products will go unnoticed in your home in terms of noise. Of course your boiler is likely to make noise, but for many people, that’s hidden away in the basement or behind a cupboard where noise cannot be detected.

Our Heated Floors Are Out Of Sight

Whereas with traditional floor heating, heat emitters often restrict furniture placement, with a Radiant Floor Heating system, the floor surface is what emits the heat. By choosing SunTouch Radiant Floor Heating or EasyHeat Radiant Floor Heating products, you won’t need to compromise the aesthetics of your rooms, since you can place furniture wherever you would like.

You can check out our SunTouch Radiant Floor Heating and EasyHeat Radiant Floor Heating products for more information

The post 4 Reasons to Buy Heated Flooring first appeared on Flooring Supply Shop Blog.

How to remove stains without replacing your floor

August 24, 2016


This marble floor was completely restored with our eco-friendly cleaning pads. Check out the final results on this blog post.

There’s no question about it, stains are never good news, but especially not when they ruin expensive furniture or flooring. Often, we jump to conclusions and assume the whole floor will need replacing, but before you panic, have a read of these simple, yet effective solutions.

Of course, the method to remove the stain will vary according to the type of stain and type of flooring, so we’ll go through each scenario.

Spills and Pet Stains

Carpet

Use an eco-friendly white vinegar, which neutralizes odors with its acidity. If dry, sprinkle baking soda and let is sit for a few hours before vacuuming.

Stone

Blot, then wipe the area with  a soft cloth dipped in sudsy water. Next use a dry cloth with rubbing alcohol, and finally, a dry cloth soaked in watered-down bleach.

Vinyl

Combine dish detergent, vinegar and warm water and scrub the area using a soft-bristled brush. Rinse with clean water

Hardwood

First, use floor wax, and if still dark, apply bleach or vinegar and allow to soak for an hour. Rinse with a damp cloth.

Oil-based stains

Carpet

Blot until no oil is left on the paper towel and then rub alcohol onto the stain. Next, apply dish soap and water.

Stone

Create a paste using ammonia or a degreaser. Apply paste to the stain, cover with a plastic bag and wait until dry.

Vinyl

Rub with a vinyl cleaner and water and soak for 15-20 minutes. Wipe with warm water and repeat.

Hardwood

Use dishwashing detergent to break down grease and rinse with water. Once dry, smooth the raised grain with sandpaper.

Water marks

Carpet

Use mineral oil to rub stains with a cloth. Sit overnight and repeat again if necessary.

Stone

Varies by type of natural stone, but generally won’t stain.

Vinyl

Use warm water and white vinegar to remove stain.

Hardwood

Use floor wax and if the stain goes deeper, lightly sand the floor and clean with mineral spirits.


Check out our great range of flooring on our website, or contact us for more information: www.flooringsupplyshop.com


The post How to remove stains without replacing your floor first appeared on Flooring Supply Shop Blog.

Why Wintertime is the Best Time of Year to Replace Your Flooring

February 9, 2014

Bathroom remodeling, bathroom accessories, Ready to tile shower pan, Shower remodeling, shower recess, niches, ready to tile recess, shower seats

Remodeling the kitchen and bathroom returns anywhere from two-thirds to three-quarters of the money invested into the project, Remodeling Magazine reports. With each of these projects, old and outdated flooring can be a major portion of the remodeling, as can replacing appliances and fixtures in the room. Remodel now to enjoy the positive changes and make more money when you go to sell your home. While it may not seem like winter offers many advantages over other seasons, especially in snowy areas like Vermont and Virginia, it’s actually a wonderful time to replace flooring: The drier air prevents the boards from gapping while the lack of humidity wards off water damage during the installation.


Bathroom remodeling, bathroom accessories, Ready to tile shower pan, Shower remodeling, shower recess, niches, ready to tile recess, shower seats

Winter works well for floorboard replacement

In the winter, contractors are limited in what they can do. Many cannot complete exterior projects, like adding on a new deck. Replacing flooring is one job they can do year round, because it happens inside the home. For you, this means a faster job completion time because contractors aren’t trying to satisfy as many jobs as during the peak season. Additionally, stores are more likely to stock all needed items so your project won’t hit a supplier-side snafu. Picking out the right shade of stain and discussing the advantages of maple, bamboo and walnut flooring can help prevent some of the winter weariness that sets in when you have long winters.

Because hardwood is so easy to clean and also hypoallergenic, it can make your daily life easier in a season when taking the dog out for a simple walk can mean tracking in wet and dirty snow. A new hardwood floor also increases your home resale value and makes your everyday life more enjoyable. If your old floor squeaked, replacing the floor can reduce the noise level in the home as well.

Planning a floor replacement

While winter is an ideal time to replace your floor, this project comes with a lot of debris. You’ll have your old floorboards that have been ripped out, plus any under layers that need replaced. You’ll also have the trim ends of anything you are installing, plus all of the equipment needed to clean and prepare your floors. In the summertime, it’s easy enough for you or your contractor to run all materials to the dump at the end of the day. In the winter, the dump may have limited hours or a winter storm can make driving unpleasant. If your city has laws that regulate the storage of garbage and debris or that specify that all garbage must fit in your garbage can, you might want to consider renting a dumpster for this project. You can find short term dumpster rentals by the day, week or month. At the end of the rental time frame, the Richmond dumpster rental company will haul away the dumpster and debris.

Additionally, polyurethane sealants have a strong odor. While the sealant will dry faster in the winter, there is a greater chance that you’ll be housebound for much of the day. If you are susceptible to odors, consider using pre-sealed floorboards. These won’t need to be stained and sealed post-installation.
 
Copyright © 2014 FlooringSupplyShop.com

The post Why Wintertime is the Best Time of Year to Replace Your Flooring first appeared on Flooring Supply Shop Blog.

How to Properly Budget and plan your Home Improvement Projects

January 31, 2014

How to Properly Budget and plan your Home Improvement Projects

Now that 2014 has started, many Los Angeles homeowners are getting their budgets together and making plans for the New Year. For many people the improved economy means that they can finally tackle some of the big home improvement projects they might have had to put off previously.

One of the biggest home improvements you can make which can reap surprisingly dramatic results is replacing your flooring. Try to imagine that old carpeting in the dining room replaced with beautiful, hardwood floors. The whole room could be completely transformed, and the value of your home will no doubt increase. It also helps that new technology and innovations have increased flooring options by the tenfold in the last few years. Just looking at Flooring Supply Shop’s options can show you just how many new options you have.

Flooring Supply Shop

Another thing you may noticed while shopping around is the number of   environmentally friendly options you have. It’s not news that there is a rapidly increasing focus on bringing sustainable materials into every facet of consumer lives, and flooring is no exception to the trend. Unlike a few years ago, there are a huge number of options today.

One option you have if you’re looking to replace some marble in your home, is to actually not replace it at all! If you haven’t heard about our Restoration Training and Cheetah Pads, just let the results speak for themselves. What could be more environmentally friendly than buffing your way to a completely new floor?

However, if you’re searching for a new look in your home that is also Eco-friendly, one of the biggest trends right now is concrete. Yes, you heard that correctly, concrete. This concrete isn’t the boring sidewalk slabs you’re imagining, since the innovations that have been made with concrete are astounding. It can be molded to fit any area, can be dyed or stained to any color, polished until it gives you a high shine look, and – barring any catastrophic events – would never need to be replaced.


While concrete is great, one of the newest, coolest, and most environmentally friendly options on the market right now is glass tiles. Eco-friendly glass tiles are made of recycled glass products (like beer bottles) which are then converted into beautiful tiles. It’s really incredible how a bunch of old wine bottles can be transformed into some truly unique flooring. On top of being an environmentally friendly flooring option, many people are using it on the walls of their home or as back-splashes in their kitchen thanks to its light reflecting properties. As an added bonus the tiles are easy to maintain and you won’t have to worry about staining as you would with many traditional types of tiles.

It seems counter intuitive to assume that hardwood floors are eco-friendly, right? Chopping down trees can’t be good for the environment. However, thanks to new advancements you can get hardwood floors without so much as knocking a leaf off of a tree due to engineered hardwood floors. In the past engineered hardwood got a bad rap thanks to it’s less than conventional look, but like every other flooring material out there a few years of time and testing has resulted in a more aesthetic appearance. In addition to being environmentally friendly, it’s usually significantly cheaper than traditional hardwood, sometimes as much as $3 a plank cheaper. They’re also much easier to install than their traditional counterparts.

When making plans for major home renovations it’s easy to get lost in the details and forget about the environmental impact your choices may have. However, it is our responsibility to do our best to use sustainable, eco-friendly products as often as we can, and that includes our flooring. Thanks to the incredible advancements in technology, Eco-friendly floor options are cost effective and very aesthetically pleasing, sometimes more so than non-green options. Just take a look around at some of Flooring Supply Shop’s environmentally friendly options and you can see just how far we’ve come in terms of green flooring options.

Copyright © 2014 FlooringSupplyShop.com

About the Author: Spencer Blohm is a freelance design, lifestyle, and entertainment blogger for Direct-ticket.net. His interests range from interior design to old Hollywood films and can often be found scavenging in vintage and antique stores for his next big find. He lives and works in Chicago.

The post How to Properly Budget and plan your Home Improvement Projects first appeared on Flooring Supply Shop Blog.

What You Should Know About DIY Flooring

November 6, 2013

What You Should Know About DIY Flooring

So you think you are ready to take on a weekend warrior project? That green shag carpet in the den has got to go. Maybe it is the dingy, torn-up vinyl flooring in the kitchen. Before you even start ripping up your old floor, make sure you have the skills, knowledge and tools, or your weekend project could become expensive and cover a few weeks.

Replacing Worn Out Carpeting

Do it Yourself, DIY, Home Improvement, home remodeling, flooring supply, bathroom remodeling, shower remodeling

An experienced DIY enthusiast can rip out old carpet and install new carpeting. The job will be messy — it is amazing how much dirt settles under old carpet. You should put down new padding unless yours is in pristine shape. This project will be easier if you remove the old tack strips and install new tackles ones, as Do-it-yourself.com suggests. Allow the new carpet to acclimate to the temperature of your home for 24 hours before installation to prevent shrinking. You still need to use a stretcher to attach the carpet to the tackles strips.

Requirements for this project include the ability to lift and move a large roll of carpet. You will also need to be able to cut it correctly. One mistake can ruin an expensive project. Seam tape can be used for minor errors.

Laying New Wood Flooring

Do it Yourself, DIY, Home Improvement, home remodeling, flooring supply, bathroom remodeling, shower remodeling

The instructions on the box say the pieces just “snap together”. How much easier could it be? You need to read the part about the sub-floor, if the package even mentions it. Your sub-floor is the base you will be snapping your new floor to according to HomeTips.com. If your sub-floor is wavy, deteriorating or running off at a 30-degree slope, your new floor will look worse with every piece you install.

DIY requirements for this job? You really need more than average handyman skills. You need tools for cutting the flooring to fit as well as a power nailer. When you consider the expense of the materials, you should hire a professional. You can easily do some research online to find contractors in your area that fit your budget for the job.

Installing Vinyl Tile

Do it Yourself, DIY, Home Improvement, home remodeling, flooring supply, bathroom remodeling, shower remodeling

Twelve-inch peel and stick flooring can be installed in a weekend without rocket science skills. One critical aspect of the job is the condition of the floor you are applying the new tile to. If this floor is not even, your new floor will not be either. The tiles are inexpensive enough that one or two mistakes should not be too costly. However, if you plan on removing old flooring, make absolutely certain it does not contain asbestos.

The Environmental Protection Agency (EPA) warns homeowners that older vinyl flooring may contain asbestos. You may not be able to tell just by looking at the tile — it may require testing. Asbestos is a mineral fiber that was frequently used in many building materials from the 1930s through the 1970s. If you are not sure whether asbestos was used, leave it alone.

To end up with a successful project, keep your tiles all going in the right direction. On the back of the tile, you will see an arrow. Each tile you lay needs to have the arrow going in the same direction. You also need to start with a very straight line, in the center of the room, and continue placing the tile straight, according to Do It Yourself. Adjustments and short pieces should occur at the edges of your room. If you work with plain tiles–those without extensive patterns–you will have better results. Save the mosaics for a professional.

Remember to not overestimate your skills when you want new flooring. Simple projects are not always simple. If you are investing a considerable amount of money into the materials, invest in a professional to install the floor. Spend your weekend relaxing while you watch someone else work.

Copyright © 2013 FlooringSupplyShop.com

Article by Joanie Ogden

The post What You Should Know About DIY Flooring first appeared on Flooring Supply Shop Blog.

Step by Step Guide to Refinishing your Bathtub

November 4, 2013

Do it Yourself, DIY, Home Improvement, home remodeling, flooring supply, bathroom remodeling, shower remodeling

Step by Step Guide to Refinishing your Bathtub

Whether you love do-it-yourself projects or are on a budget and need to do some refurbishing on your own, it`s not hard to refinish a bathtub and you`ll be surprised that you can get it done in a reasonable amount of time. Pretty soon you`ll have a beautiful new tub that will bring new life to your bathroom. It can be a focal point, or you can blend the tub with paint, tile, linens and d?cor that tie the entire room together seamlessly.

Materials:

Abrasive tub cleaner
Paint
Epoxy
Abrasive cleaning pad
Paintbrush
Paint roller
400 to 600 grit wet sandpaper

Step 1
Before doing anything else, you need to clean your tub. Remove any non-slip materials with degreaser. Use a scrubber to thoroughly wash the tub and remove all debris, dirt and other items. Don`t worry about scratching the tub because you won`t be able to tell once your refurbishing project is finished. Rinse the cleaning fluids from the tub once you`re finished so that your paint has a prime surface to adhere to.

Step 2
Sand the tub using 400 to 600 grit wet sandpaper. This serves a couple of purposes. It gets rid of any leftover cleaner on the surface and it gives the new coating a solid place to stick. Make sure you get wet sandpaper because it`s much easier to wash away as you work.

Step 3
Mix the new paint for the tub with epoxy. Make sure the two are very well combined. Look for a kit that makes it easy to combine the correct ratio of paint to epoxy so you don`t damage your tub or have to start the project over. A kit is also a great way to make sure you buy the proper type of paint so you don`t mistakenly end up with something that doesn’t hold up well to contact with water. These kits come in several sizes, allowing you to get just as much product as you need to get the job done.

Step 4
Use a paintbrush to apply the paint to the surface of the tub. Paint in one direction only and apply several thin coats rather than one thick one. Allow an hour or so of drying time between each coat.

Step 5
Use a coordinating color of caulk and apply an even line around the tub, making sure to get the corners. Smooth the caulk as you go to get an even looking appearance. Wait a day or two before using the tub to be sure the paint and caulk is completely dried.

Tips and Tricks
Before getting started with your bathtub refinishing project, it`s a good idea to protect the other surfaces in your bathroom so you don`t have damage or costly repairs to deal with. Put a drop cloth over the toilet and the floor surrounding your tub. That way, if caulk or cleaner splashes or drips, clean-up is easy and you won`t mistakenly ruin something else. Remove all towels, rugs and wall art from the bathroom as well. This will keep them out of the way and protect them from damage.

Once you`re done with the tub refinishing, replace the bathroom essentials, or shop for new items to go with your new and beautiful bathtub. Shop online or in stores for new linens,  wall art and decor items that will make your bathroom look stunning in no time. Consider a new color combination, such as gray and yellow, blue and coral or white and gray to give your bathroom an elegant and classy look. All of these choices look great with a bright white bathtub.

Copyright © 2013 FlooringSupplyShop.com

The post Step by Step Guide to Refinishing your Bathtub first appeared on Flooring Supply Shop Blog.

Announcing the Launch of Our New Website Design

October 21, 2013

After months of preparation, dedication and hard work to prepare for this exciting day, FlooringSupplyShop is delighted to officially announce the launch our newly designed website. The new site launched on Oct 20th, 2013, and is located at the same address: www.flooringsupplyshop.com
That’s right folks, we took a dose of our own medicine.

At FlooringSupplyShop.com  our goal for the new website is to provide our visitors with an extremely user friendly website. The new innovative site will offer more functionality and easier navigation with more in-depth information about our DIY home improvement products.

The new site is completely fluid, fully responsive and fits all types of browser resolutions. It also has a touch-friendly mobile navigation menu.

So, whether you are “just looking” or you are seeking more specific details about a one of our Ready to Tile Benches to use or maybe seeking more information regarding the difference option building your own shower, we are here to help you learn more as we strive to give the most updated information and offer great learning tools for different types of guests that visit our site.

When you have a few minutes, please review our new site. You will feel the commitment, the passion, and dedication of everyone in the FlooringSupplyShop family. We would appreciate your thoughts on how our efforts have resonated with you.

We hope you like our new website. If you experience any problems using it or if you have any suggestions, please contact us at contact@flooringsupplyshop.com

The post Announcing the Launch of Our New Website Design first appeared on Flooring Supply Shop Blog.

Quick Pitch System with Composeal and Ebbe Drain Installation

June 5, 2012

Projects build by Home owner with a help of a friend contractor using our Composeal DIY kit

I loved the result. The process was very easy, resulting in an accurate installation, with a perfect shower base. It is an amazing bathroom remodeling. “Thank you”.

Pictures provide by Mr. Duffy Violante,  New York

Credit for to this beautiful project to ON-SPEC. BUILDER CORP. GARDINER, NY 845-883-7453

To buy this kit or similar kits go to this page DIY Shower System kits

In this project material was used are due to the shape and size of the shower additional items was require such as Extra and Extensions in both Quick Pitch and Pre Pitch

  • Pre Pitch Kit with some Extra and Extensions pieces
  • Quick Pitch Kit with some Extra and Extensions pieces
  • Kirb Perfect.
  • Composeal Blue Waterproofing Membranes with Inside and outside corners.
  • Universal Center ring (require when using any type of Square Drain.
  • Ebbe Square Shower Drain.

Do it yourself, shower system, quick pitch, composeal waterproofing, blanke corp, schluter kerdi, ebbe drain, aqua shield,  Blanke SecurMat, shower pan, pre pitch, kirb perfect, DIY


Do it yourself, shower system, quick pitch, composeal waterproofing, blanke corp, schluter kerdi, ebbe drain, aqua shield,  Blanke SecurMat, shower pan, pre pitch, kirb perfect, DIY

Do it yourself, shower system, quick pitch, composeal waterproofing, blanke corp, schluter kerdi, ebbe drain, aqua shield,  Blanke SecurMat, shower pan, pre pitch, kirb perfect, DIY

Do it yourself, shower system, quick pitch, composeal waterproofing, blanke corp, schluter kerdi, ebbe drain, aqua shield,  Blanke SecurMat, shower pan, pre pitch, kirb perfect, DIY

Do it yourself, shower system, quick pitch, composeal waterproofing, blanke corp, schluter kerdi, ebbe drain, aqua shield,  Blanke SecurMat, shower pan, pre pitch, kirb perfect, DIY

Do it yourself, shower system, quick pitch, composeal waterproofing, blanke corp, schluter kerdi, ebbe drain, aqua shield,  Blanke SecurMat, shower pan, pre pitch, kirb perfect, DIY

Do it yourself, shower system, quick pitch, composeal waterproofing, blanke corp, schluter kerdi, ebbe drain, aqua shield,  Blanke SecurMat, shower pan, pre pitch, kirb perfect, DIY

Do it yourself, shower system, quick pitch, composeal waterproofing, blanke corp, schluter kerdi, ebbe drain, aqua shield,  Blanke SecurMat, shower pan, pre pitch, kirb perfect, DIY

Do it yourself, shower system, quick pitch, composeal waterproofing, blanke corp, schluter kerdi, ebbe drain, aqua shield,  Blanke SecurMat, shower pan, pre pitch, kirb perfect, DIY

Do it yourself, shower system, quick pitch, composeal waterproofing, blanke corp, schluter kerdi, ebbe drain, aqua shield,  Blanke SecurMat, shower pan, pre pitch, kirb perfect, DIY

Do it yourself, shower system, quick pitch, composeal waterproofing, blanke corp, schluter kerdi, ebbe drain, aqua shield,  Blanke SecurMat, shower pan, pre pitch, kirb perfect, DIY

Do it yourself, shower system, quick pitch, composeal waterproofing, blanke corp, schluter kerdi, ebbe drain, aqua shield,  Blanke SecurMat, shower pan, pre pitch, kirb perfect, DIY

Do it yourself, shower system, quick pitch, composeal waterproofing, blanke corp, schluter kerdi, ebbe drain, aqua shield,  Blanke SecurMat, shower pan, pre pitch, kirb perfect, DIY

Do it yourself, shower system, quick pitch, composeal waterproofing, blanke corp, schluter kerdi, ebbe drain, aqua shield,  Blanke SecurMat, shower pan, pre pitch, kirb perfect, DIY

Do it yourself, shower system, quick pitch, composeal waterproofing, blanke corp, schluter kerdi, ebbe drain, aqua shield,  Blanke SecurMat, shower pan, pre pitch, kirb perfect, DIY

Installation Instructions – READ

Quick Pitch with Roll-on or Vinyl – READ

Video Library Section – English and Espanol

The post Quick Pitch System with Composeal and Ebbe Drain Installation first appeared on Flooring Supply Shop Blog.

Tips for Increasing Property and Home Value for Resale

March 25, 2012

Quick Improvement Tips for Increasing Property and Home Value for Resale

home improvement, DIY, Home remodeling, Bathroom remodeling

Your house is not free from the hazards of everyday life. From my work in Hamptons Real Estate, I’ve seen it all: Water damage, chipping paint, mold, decay, pests and more. And as seasons change from warm to cold and vice versa, many aspects of your home are affected congruently. For those looking to move and/or upgrade, it’s become cumbersome to attempt to make everything more appealing, yet deal with the hassle of finding new real estate.

As you prepare to leave your humble home for a new house you need to spruce up the old place to make it appealing to buyers. What can you do to quickly and affordably improve your home for resale?

First off, you need to remember that focusing on the outside is just as important as focusing on the inside. First impressions are everything, so if you can impress someone the instant they see the outside, you’ll already have a good start. You may not believe it, but a new coat of paint can do wonders for a home. It’s as if that fresh coat of paint revitalizes the house and really grabs the eye from the outside. Having a freshly cut, healthy lawn can also greatly improve your standing with buyers. If you have the means, landscaping is even better. Some lovely plants, shrubs, trees and even a garden can really liven up your yard and add some personality and color.

A more costly option, but a great one, is a carport. Carports are cheaper to install than garages, but serve the same general purpose. Carports can greatly increase the value of your home as long as the carport is permanently installed.

The interior is the place many sellers dread to fix up for resale. Many homeowners can walk through their house and list off everything they either need or want to do to whatever room they see. Fixing up the interior of your home doesn’t need to be a nightmare. It just requires some cleaning and some key improvements.

To start off, we’ll go back to an old favorite. Painting the interior of your home can have just as big of an impact as it does on the outside. It makes every room seem fresh and new and appeals very well to new buyers.

Another very simple trick is to replace all your old wall outlets. If the old ones are two-prong, buy three-prong outlets, and try to gather a handful that will match the style of your current wallpaper and/or paint. You can always buy regular wood grain and paint them later on! When you’re doing a walk through with a potential buyer, you can point this out.

If you have carpet that is old, stained, torn or worn out, consider getting new carpeting. Remember, though, if you do decide to get new carpets get them after you have painted and the paint has dried. There is no point in getting new carpeting if it’s only going to get marred by paint stains.

As for any tiled or hardwood floors, if the tiling is dingy, stained or discolored, you should also consider replacing that as well. Where carpeting might have to be installed by professionals, tiling can be done on your own. If you don’t feel comfortable doing any of the cutting or measurements, you may need to call professionals. As for hardwood floors, you’re probably better off giving them a good cleaning instead of trying to replace them.

You’d be amazed what some cleaning, a good coat of paint and some elbow grease can do for the resale value of your home. Remember that you’re not only fixing up your home to sell it, you’re fixing it up so someone else can enjoy your home just as much as you have.

Article provide by Hamptons Real Estate

Copyright © 2010 FlooringSupplyShop.com

The post Tips for Increasing Property and Home Value for Resale first appeared on Flooring Supply Shop Blog.

Windows Not Just a Piece of Glass

July 4, 2011

Windows, Home remodeling, DIY, exterior remodeling, Flooring Supply, do it yourself, home improvement

It’s early in the morning and you’ve just opened the curtains to bring in the bright new day. Or perhaps the snow is falling softly outside as you snuggle up with a cup of hot cocoa at your window seat and take in the view. Windows have been around for hundreds of years, and while their basic purpose has not changed, they have gone from being a necessary “hole in the wall” to a significant element of design.

What is the definition of a Window? According to Webster’s dictionary, a window is an opening, usually framed and spanned with glass, built into a wall for light and air. We still use windows for this fundamental purpose. Properly placed windows can provide cross ventilation and eliminate the need for artificial lighting during the day. Most people have at one time or another been in a dark, dreary room that simply needed the light of a window. Current national code requires that the glazed area of the windows (that is the glass itself) equal 8% or more of the square footage of a room.

Windows can range widely in style and cost. If you prefer contemporary styling, you may choose to go with a casement style window (a unit that either cranks out to the left or to the right). A more traditional style is the double hung unit (a unit that slides up and down). Other styles include horizontal sliders, awnings, and transom windows. A window manufacturer can provide detailed descriptions of the various styles available. The styles are as plentiful as the prices are varied. Of course, you can mix and match units. For example: in your kitchen you may desire a casement unit above the sink because they are easier to open reaching over the counter; however, adjacent to the kitchen, in a gazebo shaped breakfast area, there is no reason you should not consider using double-hung units.

Let’s take a closer look at the two most popular units, the casement and double hung window. There are pro’s and con’s to both. The casement offers full ventilation when opened where the double-hung only gives about half. However, if you have a group of casements units overlooking your deck or patio, be aware that casements take up exterior living space. So be careful at parties; open casements can be very painful when walked into. Probably the best part of double-hung units is many new models tilt in for easier cleaning, where as the casement does not offer a similar feature.

Whether you are building new, adding on additional space, or renovating a room in your home, the windows you choose should play a major role. When looking at windows for your new project, look carefully at the hardware, is it well manufactured? Plastic hardware may provide a more contemporary look, but also tend to break sooner. Open the windows at the showroom, do they operate easily? Do they offer a good warranty on the unit as a whole? Most manufactures should cover the windows for at least ten years. Check the energy efficiency (insulation value) of the particular units you are interested in. I recommend a minimum insulation value of R-3. Most units nowadays carry an insulation value of at least this, and very often it is higher. Overall, examine the quality of the unit on the interior as well as exterior.

You will find that the cost of windows is quite significant, but you get what you pay for. You want your windows to last 30 to 50 years, therefore they need to be constructed from good quality materials and made to last for long time. If you skimp on quality, you may have problems in as little as 5 years. Depending on the number of windows your project calls for, you should plan to spend approximately 5%-10% of your entire building budget if you are adding on or building a new home. This percentage is higher for smaller renovations.

Windows provide much more than light and air today. A properly designed window can make or break the mood of a room. Today’s windows should be treated as an integral part of the design and NOT JUST A PIECE OF GLASS.

Article provide by
designconnection.com


The post Windows Not Just a Piece of Glass first appeared on Flooring Supply Shop Blog.

Get the Right and Balanced Home Improvement

June 10, 2011

Do it Yourself, DIY, Home Improvement, home remodeling, flooring supply, bathroom remodeling, shower remodeling

Home Improvement scenarios have appreciated excellently over the years. The need for balanced home improvement has insured great levels of professionalism in the process. As a house owner you need to make certain considerations before even starting a home improvement process. The time at hand, the budget and the technical specifications play a major role in home improvement procedures. You need to maintain equilibrium in all aspects to ensure that all the criteria are met. So, let us discuss certain key areas and elements that need to be looked into for a balanced home improvement.

The Budget: Undoubtedly, the budget plays a huge role. You must always keep the monetary considerations in mind before you decide on the home improvement process. This helps you get a clear cut perspective on the key areas of your home that need improvement. The budget justification of these areas is also the key. Firstly, you can always specify a gross budget. Then you can specify the vital aspects of home improvement. Lastly, cross check whether the budget fits your home improvement demands. Such thorough analysis will help you eliminate the unwanted home improvement needs that might arise out of random sampling.

Use of Resources: Effective and efficient use of resources is the key. It is important that you know your house well. You must have good knowledge of your household goods and the durability factor involved with them. A reasonable analysis helps you know the actual need for change or make over in all the relevant areas.

Integration of the Elements: Integration of certain elements can bring a sense of uniqueness to the home. A good balance of the elements can help any room feel more inviting. Try wood and houseplants to invoke the feel of earth and air. Plants are especially good because not only do they look nice, they actually improve the quality of the air. Candles are great to bring fire’s warmth into a room, as is a fireplace. And a gorgeous fish aquarium or tabletop fountain provides the soothing energy of water. This is one example that presents a blend of exceptional budgeting and efficient utilization of resources.

Renovation: “Renovate” is the key to any home improvement project. You should always know the longevity of all our home belongings. This helps you judge the span of your home improvement project and the time specification you can have. The thin line that separates the need to renovate and the need to change can make a vital difference to the cost of any home improvement project.

The Exteriors: With all the potential improvements you can make to the interior of your home, it’s easy to neglect the outside. But the outside of your home is the first thing people see. If you live in a wood home, make sure the paint is fresh and un-chipped. Paint the shutters a new color to give your home renewed interest. Flower plantation and tree swings can add a great charm to your garden. Installing a pool or hot tub is also a good idea. Not only will you get the benefits of having your own place to splash around in, your home will be worth more if you ever decide to sell it.

Flooring: The flooring or the baseline of the homes makes a lot of difference. These days you have options to choose from. You can always try the new eco-friendly floor heating options available in the market. These not only keep your floor warm in winters but make sure that the heating is balanced in accordance with the outside temperature. They also serve as the best home improvement tasks when it comes to balancing. The amount of energy saving that they do as being substitute to floor heaters is phenomenal.

I hope these details help you get the right and balanced home improvement.

Copyright © 2010 FlooringSupplyShop.com

The post Get the Right and Balanced Home Improvement first appeared on Flooring Supply Shop Blog.

Don’t Fall Victim to the DIY Hype

May 1, 2011

Contractor Directory, Remodeling Contractor, contractor, subcontractors, contractors directory, construction directory

DIY home improvements are all the rage and many homeowners are choosing these instead of hiring professionals. Though it is an easy way to save a few bucks, one must ensure that the DIY task undertaken by you is successfully completed. A properly executed home improvement task will not only enhance the aesthetics of your house but will also add to its value.

You must realize that a DIY home improvement demands patience, perseverance, skill and tool. Hence, if you think that you have all of these you can surely complete any DIY task; but if you have even a slightest doubt about your capabilities, do not start the task. The most important thing that you need to have is time; because if you do not have adequate time to finish it then your house will be in a mess till the time you finish it.

The next thing that needs to be ensured is that you must know how to do the task, along with having all the necessary tools. With the increasing popularity of these tasks, more and more manufacturers are producing and marketing products for the DIYers. To get information about the task, you can take help of a friend who has done similar task as he will be able to guide you better as to what needs to be done. It is advisable to gather all the information about the project and then decide whether or not you have the abilities to complete the task. Moreover, something that may be cake walk for your friend may not easy for you; hence whatever you decide make sure you do not have to face incredibly difficult time while doing the task.

There are certain tasks that may sound simple but in reality they are not. For example, painting a room is a simple task but painting the whole house on your own is not because it demands significant amount of time, stamina and skill. You need to judge whether a task is actually a DIY task or not; fence building may sound easy but in reality it may not be that easy. In contrast, painting a fence is an easy task and can be successfully done by almost everyone. However, task like deck building and dry walling are daunting and should be left for professionals because even after putting in all the efforts you may not be able to replicate what a pro can do.

Since you can judge yourself best, you will be able to make a wise decision whether or not you can complete the task and that too with perfection. In case you feel that certain home improvement task is not your cup of tea, you must avoid doing it. Moreover, doing a task that gives an impression that an amateur did it, takes away the value and appeal of your home. To avoid this, you must hire a pro who is skilled, experienced and have completed similar task with perfection.

Hence, do not fall victim to the DIY hype and do a DIY home improvement task only because your friend or neighbor did the same. Keep every aspect in perspective and then make a final decision whether or not you should do a particular DIY task.

Copyright © 2010 FlooringSupplyShop.com

The post Don’t Fall Victim to the DIY Hype first appeared on Flooring Supply Shop Blog.

Laminate Flooring Advantages and Disadvantages

March 20, 2011

hardwood care products, hardwood flooring, Laminate, laminate cleaners

Laminate flooring is fast becoming a preferred choice of most of the homeowners. If you are contemplating to install this flooring in your home, it is advisable that you know all about it. Like any other flooring option, laminate flooring also has its share of advantages and disadvantages. Knowing about these will help you make an informed decision.

The biggest advantage of laminate flooring is its toughness and durability. Irrespective of the amount of foot traffic, it can stand all the wear and tear without any scratch. In addition, laminate flooring is also resistant to stains and impacts. Unlike wood and marble, the laminate flooring does not fade when exposed to sunlight; thereby retaining its original look. Moreover, laminate flooring is the easiest to install and can be conveniently done by ‘do-it-yourself enthusiasts’ in no time. Laminate flooring is primarily available in the form of ‘snap together flooring planks’ which can easily be installed without any need for nailing, stapling or gluing to the sub-floor.

hardwood care products, hardwood flooring, Laminate, laminate cleaners

One of the biggest assets of the laminate flooring is its resemblance to real wood. The texture and color of the laminate flooring is of such high resolution that it is difficult to differentiate whether it is real wood or laminate. Moreover, unlike wood, laminate flooring does not contract or expand. Another important advantage of laminate flooring is its versatility. It can be installed over any substrate, be it wood or concrete. This makes it a preferred choice for homeowners, especially those who are looking for durable flooring option. It is also an affordable flooring option, compared to its other counterparts such as marble or hardwood; which can be quite expensive.

Along with these advantages, there are certain disadvantages which do not make laminate flooring an ideal flooring option. A major flaw of laminate flooring is its susceptibility to moisture. Laminate is made from ‘High Density Fiberboard’ (HDF) which can be damaged by moisture. On prolonged exposure to standing water the HDF breaks down and expands; the only solution to this problem is replacement. Once damaged, it is hard to repair and replacing the flooring in such cases is always an expensive option. Hence, if your house is susceptible to moisture, you need to avoid installing a laminate floor.

hardwood care products, hardwood flooring, Laminate, laminate cleaners

Another disadvantage of laminate flooring is that though it is recommended for “do-it-yourself enthusiasts”, it still requires some amount of skill. Along with having all the necessary instruments and skill to install it, you need to exercise some patience. The installation needs to be done properly where the initial and the final phases of installation are the most important as well as difficult. If the installation is not done properly, the place looks untidy and unappealing. Laminate flooring also tends to be quite slippery which can sometimes result in serious injuries.

Therefore, it is advisable to gain ample information on laminate flooring before going in for it. Weighing all the pros and cons of laminate flooring will help you make a wise decision.

Copyright © 2010 FlooringSupplyShop.com

The post Laminate Flooring Advantages and Disadvantages first appeared on Flooring Supply Shop Blog.

Proper Care for Your Sub Floor

December 2, 2010

subfloor, backer board, cement board, self leveling, plywood subfloor, DIY

Sub floor is one of the most important elements flooring. It is the immediate layer above the floor joists and beneath the flooring that you walk on. It is the base on which the finished flooring is laid, such as laminate, linoleum, hardwood or carpet. Sub-floors are made up of different material including concrete and plywood. The sub floor needs to be stable and leveled to ensure the longevity of the flooring laid upon it. However, like other things at home, sub flooring can also get damaged over period of time.

Sub floor is one of the most ignored areas of your home and you often do not pay enough attention unless the problem is serious. Fixing a big problem can be expensive as well as tedious; to avoid this, you need to pay attention to your sub floor from time to time. The problems may vary depending upon the age and type of your sub floor. There may be a problem with the sub floor if there is a persistent musty smell which does not go way even after you have tried everything. A dip or a gap in your flooring also suggests that there is something wrong with the sub floor. It is advisable that the moment you experience a problem try to resolve it as soon as possible.

subfloor, backer board, cement board, self leveling, plywood subfloor, DIY

Depending upon the extent and type of problem the solutions vary. In case of tile flooring over sub floor, you may be able to remove the tiles, resolve the problem, and reinstall the tiles back. However, if you have vinyl or laminate flooring, then you will have to rip out the old flooring and install new flooring after repairing the sub floor.

After you remove the finished flooring on the sub floor take a closer look to find out the cause of the problem. Most of the homeowners use plywood sub floor as it is cheap, light and easy to install. A common problem caused to plywood is rotting, which happens due to water or moisture damage. To overcome this problem you may either have to remove the damaged portion or the entire sheet of plywood; hence proving to be an expensive and taxing option. There may be certain types of damage which you can deal with on your own, but there would be certain problems for which you will need professional help. Therefore, it is highly recommended to keep a check on your sub floor from time to time in order to prevent any severe damage from even occurring.

subfloor, backer board, cement board, self leveling, plywood subfloor

Like every other part of the house, flooring too is a key part, which carries the weight of walls, roof, furniture and other interiors. In order to have a strong foundation which can withstand weight of everything inside your home, you need to take care of the sub floor as well. Along with providing the strong base to your home, proper care for your sub floor can help you save time, effort and money.

Copyright © 2010 FlooringSupplyShop.com

The post Proper Care for Your Sub Floor first appeared on Flooring Supply Shop Blog.

Paint Your Tile Floor for a New Look

November 7, 2010

ceramic bathroom tiles, stainless steel tiles, mosaic tiles, Glass Tile, Metal Tile, Tile Trims, Ceramic tile, Shower Tile, Flooring Tile, Los Angeles Tile, stone, Porcelain, marble, Granite, install tile, Counter top tile, Bathroom Tile

Many homeowners choose tile flooring for their home as these are durable, attractive and available in an assortment of colors. However, over the years, tiles look dull and dated; hence, you need to change them. Instead of tearing them apart, an inexpensive and fast way of changing the look is to paint the tiles.

There are different types of tile paints available in the market, though the most commonly used ones are enamel and latex paints. Latex is a water soluble paint which is comparatively less dangerous than enamel. Enamel paint is soluble in thinner or alcohol which air dries to a hard and glossy finish. Though this paint lasts longer, one needs to be careful while using it because of its fume content.

An important factor to keep into perspective while choosing the paint is the area where the tile is installed. The wear and tear as well as the exposure to moisture the area is subjected to, plays a significant role is assessing whether a certain type of paint is right for a particular room or not. You cannot use latex-based paint in rooms which have high foot traffic because it tends to chip with the slightest impact. The tiles in such areas should be refinished, which not only make it long lasting but also enhances the look.

You also need to choose the right color which complements the decor of the room. The right color contrast can drastically change the look of the place, making it more appealing. You can even use two or more different colors to make beautiful patterns and designs. Only caution while doing this to have a proper layout and work accordingly. This requires certain amount of skill, hence do not do it on your own if you lack the artistic bent of mind. Instead take help of professionals to get beautiful floor designs and add uniqueness to your home.

Painting is not a daunting task and you can easily do it on your own. Before you start painting you need to thoroughly clean the tiles and grout, to remove the dirt and other buildup. You can use bleach or hydrogen peroxide for removing the molds and mildews on the grout. Once done, thoroughly rinse it with water. After cleansing, the next step involves sanding the tiles so that, the paint sticks to it. You can either use fine grit sandpaper or an electric sander. After sanding, remove all the dust.

Next apply primer on the tiles, use the one that is recommended for glossy surface. It is advisable to apply two coats and after it has dried sand it again. After this, clean the whole surface and once done, you can paint the tiles. Painting can be done by brush or spray paint. The spray paint offers better and faster results, in comparison to painting done by brush. Moreover, spray paint tends to dry quickly. Give enough time for the paint to dry before you step on the floor. Once painting and drying is over, your home will have a whole new look.

Copyright © 2010 FlooringSupplyShop.com

The post Paint Your Tile Floor for a New Look first appeared on Flooring Supply Shop Blog.

Why Should you Choose Brand Name Flooring

October 30, 2010

ceramic bathroom tiles, stainless steel tiles, mosaic tiles, Glass Tile, Metal Tile, Tile Trims, Ceramic tile, Shower Tile, Flooring Tile, Los Angeles Tile, stone, Porcelain, marble, Granite, install tile, Counter top tile, Bathroom Tile

One of major decisions that every homeowner needs to make is to choose the right flooring material for their home. The wide variety of flooring options, make the decision all the more daunting. However, choosing brand name flooring material, over generic flooring options, proves beneficial for homeowners in several ways. Although, homeowners may have to pay little more for these branded products but it is worth spending the extra money as brand name flooring products are durable and cost effective. Once installed, homeowners can enjoy the benefit of good durable flooring, for years to come.

Branded products are beneficial in every way, as it offers better quality, guarantee and material which is durable. The leading brand names offer customers a wide range of options, including different materials such as marble, hardwood, tiles and laminate flooring. These are available in wide choices of colors, patterns and styles, which make it easier for the buyer to choose from. Moreover, the brand names ensure quality. Whatever branded flooring material you buy, would come with assured quality, which is worth all the investment. In addition, one of the biggest advantages of branded products is that all these flooring options are durable. With proper maintenance and care, the branded flooring options are long lasting which increase the overall value of the house. A company becomes a brand only when it offers quality and durable products, which eventually earns them a broad clientele. Hence, if you choose a brand name, you can be rest assured that the product is of high quality which will be long lasting.

ceramic bathroom tiles, stainless steel tiles, mosaic tiles, Glass Tile, Metal Tile, Tile Trims, Ceramic tile, Shower Tile, Flooring Tile, Los Angeles Tile, stone, Porcelain, marble, Granite, install tile, Counter top tile, Bathroom Tile

The leading brands in the field constantly carry out research & development, in order to produce new and innovative products. The options available to the customers increase manifold with the introduction of new & useful products. Companies also offer customized solutions to incorporate the specific requirements of their customers. Moreover, with the increasing competition, companies strive to offer better quality products at lower rates, which eventually saves customers significant amount of money.

ceramic bathroom tiles, stainless steel tiles, mosaic tiles, Glass Tile, Metal Tile, Tile Trims, Ceramic tile, Shower Tile, Flooring Tile, Los Angeles Tile, stone, Porcelain, marble, Granite, install tile, Counter top tile, Bathroom Tile

In addition, branded products last longer, and the flooring does not demand frequent repairs. Good quality branded products makes the flooring strong & durable to withstand greater foot traffic without fading and staining. With the use of branded products the maintenance cost for flooring decreases, which add on to the savings for the customers. An important reason why customers should opt for branded products is because these products come with a warranty. For the sake of their reputation, big brands of the industry ensure to provide quality products that prove beneficial to the customer.

Owing to all this certain companies have become household names and leading brands, whose products can be bought by customers with surety of quality and durability. Hence, in case you are contemplating with the idea of purchasing flooring for your home, consider buying brand name products. Though you may have to pay a little more for these branded products; it will save you time, effort and money as these lasts longer and offer value for your money.

Copyright © 2010 FlooringSupplyShop.com

The post Why Should you Choose Brand Name Flooring first appeared on Flooring Supply Shop Blog.

Trend Setter in Home Furnishing

October 14, 2010

home remodeling, home furnishing, home design, flooring material, contractor directory, DIY, do it yourself, hardwood flooring, bathroom accessories

Home furnishing has always been thought off as the most tedious task in home management. The time consumption that takes place is something that has always been a hindrance in home furnishing. House owners these days have shifted focus to an all new concept of home furnishing. Popular trends in home furnishing include mixing old and new, classic and contemporary. Furniture has always been on prime radar of the house owners. They look for a mixed blend of beauty of the art and color in the furniture. But, choosing the right blend and in appropriate measures is the key. Furniture makers have been very responsive to this fashion, so now it’s easier than ever to purchase fine reproductions of vintage and modern collections. So here are some important trend setting aspects and designs that make your living area complete. You can either opt for singular collection or blend of many depending on your requirements and taste.

home remodeling, home furnishing, home design, flooring material, contractor directory, DIY, do it yourself, hardwood flooring, bathroom accessories

Gold Furniture: This is one of the major trend setters as far as home furnishing is concerned. Regarded as one of the oldest and royal home furnishing design, gold furniture types are no more luxurious and costly. Gold French furniture is nowadays usually finished in genuine gold leaf, and artisans make sure to give a distressing look to those areas where most natural wear would have occurred. The outcome is just awesome. This is a hard earned creation as it undergoes a multi tasking process of hand sanding, filling, sealing, painting and antique aging. Rich Rococo pieces, such as beds and chests of drawers are hand-carved, again, following the methods used hundreds of years ago.

The Vintage Style: Again a very effective and costumer centric furniture pattern. Vintage is generally a blend of Rococo furniture and chateau style. Versailles style is way over the top, but using a few rococo and baroque style items, such as a reproduction chateau de Versailles chandelier or a beautiful gilt mirror will give a glamorous look to your contemporary home. People with large dining rooms generally prefer this style of furniture.

home remodeling, home furnishing, home design, flooring material, contractor directory, DIY, do it yourself, hardwood flooring, bathroom accessories

The Mirrored Furniture: This is generally used when house owners want to bring some sanity to the house. Instead of glitter of artwork, many a times the mirror furniture is preferred by house owners. If you want something more exotic, choose a couple of items from a popular silver embossed range and mix them with white painted chateau furniture.

The Real Budget Design Ideas: If a budget based home furnishing is your cup of tea, then here are some important designing ideas for you. De Cluttering is always a good idea to start with. Minimizing accumulation is the key. This can be done by deciding which items must be retained and which can be thrown out or given away. Then be sure to maintain this system on an ongoing basis. Color management also plays a very vital role. Consulting a home furnishing expert also can be of great help. You’ll better understand how to incorporate color, lighting and texture into a room and also receive valuable tips on ensuring furnishings are in proportion with other things in a room for visual appeal.

With the wealth of information available, designing your first home or redesigning the interior of your existing home becomes a fun and exciting and cheap project rather than a stressful chore. By combining your creativity with tips gathered from various cheap or free publications, your home interior design project is sure to turn out to be a stunning success. As a final suggestion, surfing the internet and finding different combination’s and permutations that work can also provide relevant inputs.

home remodeling, home furnishing, home design, flooring material, contractor directory, DIY, do it yourself, hardwood flooring, bathroom accessories

I hope these inputs help you enhance some knowledge on catching the right trend in home furnishing.

Copyright © 2010 FlooringSupplyShop.com

The post Trend Setter in Home Furnishing first appeared on Flooring Supply Shop Blog.

Tips for effective floor buffing

October 3, 2010

ceramic tiles, Hardwood floor. Laminate flooring, stone, marble, granite, travertine

Like other parts of the house, hardwood flooring also requires maintenance. Over the years, with constant wear & tear the floor starts losing its luster. Though, a lot of people resort to changing the flooring when it starts to wear down; this however is not an advisable option.

One of the most effective ways of dealing with worn out flooring is by buffing it. One can easily use buffing for refinishing the floor, so that it looks as good as new.

Instead of replacing the old hardwood flooring with a new one, most homeowners prefer buffing the flooring, which saves them time as well as money. Using harsh chemicals is not advisable as it will actually harm the floor by either staining it or affecting its natural sheen. Buffing on the other hand is safer and can help keep the fresh look of the floor, as if it was new. Moreover, buffing can be easily done on every type of flooring, whether it is marble or hardwood, with the help of a buffing machine. In case of carpet flooring, one can use the brush attachment instead of pads in the buffing machine; which effectively cleans and scrubs the carpet thoroughly.

It is a process, which can easily be accomplished by DIY enthusiasts. Whatever may be the type of floor you wish to buff; it should first be dust mopped and cleaned thoroughly. Next, you need to install the buffing pad and set the speed of the machine at 1-2 ft. per second. Move the machine in a straight line, overlapping each pass by 2-4 inches. You need to buff the floor till the required gloss is achieved. Similarly, repeat the whole process in other areas of the floor as well. Check the pads, and change them in case they have become dirty or worn out. After buffing is complete, dust mop the floor and follow it by wet vacuuming. Make sure to clean all the equipment, before storage.

Although it is easy, there are certain things that one needs to take care of while buffing the hardwood floor. Replace worn out pads as it can cause scratches on the floor. You need to select the appropriate pad and solution for the type of floor to be buffed. It is advisable that you evenly spread the solution over the particular section of the floor, and buff the area two to three times for best results. While buffing the floor, you must ensure to start from the end of the room, moving backwards, so that you do not step on the cleaned floor.

You will need to apply three different solutions, namely stripping, wax and polish solution. Though using a floor buffing machine is not very difficult; it is advisable to exercise caution since the buffing machine is quite big in size.

Flooring is the most essential part of any house and hence, requires utmost care. By just following some of the simple measures mentioned above, you can have a clean, shiny and durable flooring.

Copyright © 2010 FlooringSupplyShop.com

The post Tips for effective floor buffing first appeared on Flooring Supply Shop Blog.

budget friendly flooring options

September 12, 2010

ceramic tiles, bamboo flooring , concrete floors, mosaic tiles, Glass Tile, Metal Tile, Tile Trims, Shower Tile, Flooring Tile, Los Angeles Tile, stone, Porcelain, marble

Flooring is an integral part of any house; be it construction or renovation, it is essential to select the appropriate flooring material that not only provides durability but enhances the interiors as well. Amongst the numerous options available in the market, choosing the right flooring option can be overwhelming. Natural hardwood flooring and carpets, though makes a place look great, but are quite expensive and beyond the budget of most of the homeowners. Nevertheless, there are many budget-friendly and beautiful flooring options which can render a great look to your home.

A cheap but nice flooring idea which can make your floor look attractive is the bamboo flooring. Bamboo, a grass, effectively imitates the look of a wooden floor and is generally harder than most of the hardwood flooring. These are available in two shades, the natural light-color and the darker look which is accomplished after the grass is carbonized. Moreover, apart from being budget friendly, bamboo is also an environment friendly flooring option.

ceramic tiles, bamboo flooring , concrete floors, mosaic tiles, Glass Tile, Metal Tile, Tile Trims, Shower Tile, Flooring Tile, Los Angeles Tile, stone, Porcelain, marble

Another great budget flooring option is the laminate flooring, which is durable as well as attractive and easily simulates wood or in some cases, stone. These are available in a wide range of colors, patterns and designs which can easily complement the decor of any house. Moreover, the versatile flooring is easy to install and can be done by ‘DIY’ enthusiasts without any professional guidance.

Ceramic tile flooring is a cost effective flooring option, which is increasingly being used in residential and commercial buildings. It is one of the most durable flooring options which is available in scores of color; light, dark and blended colors. Furthermore, the tiles are available in different styles and sizes which can be customized as per your requirement. You can mix & match different tiles to render an attractive look or use mosaic tiles to enhance the look of the interiors. The ceramic tiles resist staining and are easy to maintain, without any special cleaning requirement. However, these tiles can sometimes be slippery, so it is advisable that you apply an anti-slip coating, which is readily available in the market.

ceramic tiles, bamboo flooring , concrete floors, mosaic tiles, Glass Tile, Metal Tile, Tile Trims, Shower Tile, Flooring Tile, Los Angeles Tile, stone, Porcelain, marble

Inexpensive than other types of natural flooring, the cork tiles provide natural and rich look to the house. This flooring option is especially perfect for those for those with an ecological bent of mind. Along with lending a striking elegance and finish to the room, one of the most endearing qualities of cork is that it is a great insulator. As a result, it keeps the floor warm during winters and cool during summers. Moreover, its soft texture gives a comfortable feel when you walk on it, similar to that of carpet. Available in both tiles and planks, you can choose amongst a variety of colors and finishes.

Concrete flooring is also a popular budget flooring option which gives the place an unfinished and earthy look. The option is nearly endless as these can be stained, colored, painted and even customized. Furthermore, these are easy to install, inexpensive, highly resistant to various elements, easy to clean and maintain.

Amongst all these flooring option, you can choose the one which best complements the house interiors. The right budget flooring can render a great look to your home, without burning a hole in your pocket.

Copyright © 2010 FlooringSupplyShop.com

The post budget friendly flooring options first appeared on Flooring Supply Shop Blog.