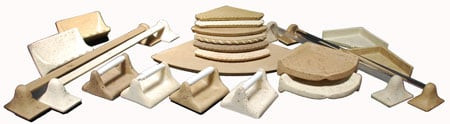
Installation of a ceramic toilet paper holder without tile surrounding
(Same procedure with minor changes can apply to almost any of the bathroom accessories)
Installing a ceramic toilet paper holder is not a difficult task. Before you get started, you will want to gather these tools and materials:
- Hammer
- Keyhole Saw
- Razor Knife
- Chisel
- Caulk gun
- Tape Measure
- Level
- Shop-Vac
- Pencil
- Tube of Caulk
- Ceramic tile grout
- Masking Tape
- Construction Adhesive
The first step is to determine exactly where you want to install your ceramic toilet paper holder. Most fixtures are approximately six inches long by five inches wide. On the back of the fixture you will see a square that is slightly smaller than the fixture and raised about one half inch. This smaller, raised, area will be the actual size of the hole we are going to cut into the wall. For this example we are going to assume that the raised area is five inches by four inches.
Before we do any cutting, we need to mark the wall. Hold a level on the wall at the height where the bottom of your toilet paper holder will be. Make sure the level reads level. Next, place the fixture on top of the level. Trace around the two sides and the top of the fixture with a pencil. Then remove the fixture and draw a line across the top of the level.
You should now have a nice level square drawn on the wall. However, this square is going to be the actual fixture size six by five and not the smaller size of the raised portion on the back (the size we need our hole to be). Remember that most of the time your raised area will be about 1 inch shorter in both length and width. So, take a tape measure and measure one half inch from the bottom pencil line you made to the center of the square and make a new mark. Do this for the other three sides as well. Next, take the level and place it on the mark you made from the bottom and draw another level line, making sure not to allow your pencil mark to go outside of the original square you drew on the wall. Do this for the sides and the top as well.
Take a keyhole saw and carefully cut out the inside smaller square you marked on the wall. If you hit a stud while cutting you can use a razor knife or box cutter to finish the job. Now make sure that the fixture fits in the hole. If it doesn’t, make adjustments as necessary to get a good fit.
We are now ready to glue the fixture into place. You may use either construction adhesive or unsanded tile grout for this purpose. The grout is easier to clean up if you accidentally get some on the wall, but the choice is up to you.
Construction Adhesive:
- Be careful and use it sparingly. A small bead around the back edge and in between the raised portion of the fixture is plenty
- Place the fixture into the hole and press firmly. Use masking tape to hold the fixture in place until the adhesive dries.
- Be sure to clean up and adhesive that got onto the outside of the fixture before it dries
- After the adhesive dries remove the tape and place a small bead of latex caulk around the entire fixture and you are ready roll
Unsanded Tile Grout:
- Mix a small amount of grout with water in a bucket. The grout should be about the consistency of peanut butter, and the size of a softball, when mixed.
- Place a softball size pile of grout on the back of the fixture and press it firmly into the hole.
- While holding the fixture into place with one hand, use the other to wipe off any excess grout. You can avoid using latex caulk by smoothing the joints around the fixture with your finger.
- The fixture should stay in place by itself, but you can use some making tape to hold it in place if it does not.
- Take a damp sponge and wipe the walls and any excess grout that may have gotten on the fixture.
- Once the grout is dry, you may install the roller and tissue.
Copyright © 2010 FlooringSupplyShop.com
People are very busy today and when you are looking for something and find it, you really want to thank the author – and this is what I am doing right now – Thanks!