Installation Manual ClearPath Curbless Shower Pan System

Pre-Planning Your Installation
Gather all required tool and materials prior to starting your installation.
Recommended Tools:
- Circular Saw or Reciprocating Saw.
- Wet Saw, Impact driver / Cordless Drill, Float
- 3/16” V-notched Trowel
- Hammer, Screed
- Hack Saw
- Utility Knife or Heavy Duty Shears
Other Materials Needed
Sand/Mortar Mix – Modified Thin Set – PVC Pipe Cleaner – PVC/ABS Cement – 2” x 4” Joist Hanger – 2” x 4” Lumber for Blocking – Drain Grate (Sold Separately Available in Several Finishes)
Sub Floor
Sub Floor must meet local building code requirement and Tile Council of North America (TCNA) guidelines
1. Determine shower area, bearing in mind that the maximum distance in any one direction from the drain is four (4) feet if subfloor assembly is 1 ¼’ (1.25″/3.17cm) to maintain desired slope.
2. Remove sub floor and if possible remove subfloor along the center of existing joists. Reveal of subfloor from sill plate may not exceed 3/4″ (.75″/1.91 cm).
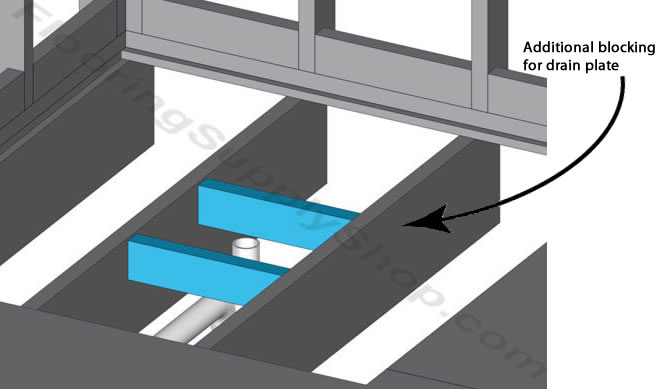
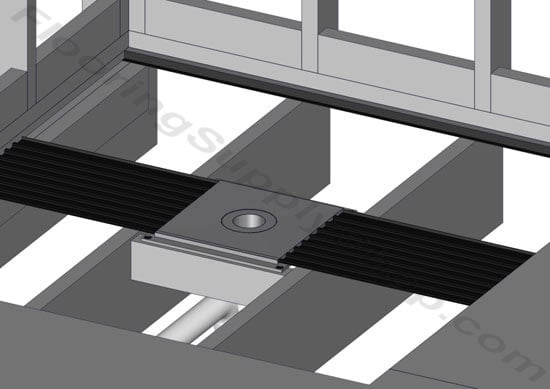
3. Blocking Installed for Drain Plate
Confirm location of the drain, move if needed. If drain location is close to an edge, total removal of subfloor may be necessary to achieve desired slope. Block around the drain with two (2) pieces 2″x 4″ lumber. The top of 2″x 4″ blocking is to be¼” below top of joist. (This puts the flange of the drain plate flush with top of the joist when installed). Blocking at drain location needs to be 12 3/16″ (12.1875″/30.96cm) o/c.
4. Match 2″ I.D. schedule 40 pipe type (PVC or ABS) of the drain plate to drain stub, clean and glue joints with appropriate PVC/ABS cleaner and glue.
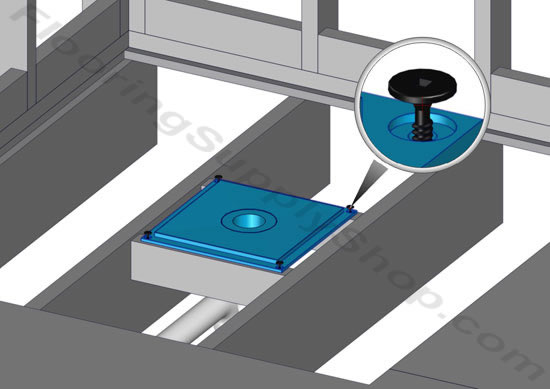
5. Drain Plate Installed
Fasten ClearPath drain plate to the 2″x 4″ blocking using four (4) 1 5/ 8″ black screws.
6. Installation Manual Additional Blocking For Support of TI-ProBoard
The ends of TI-ProBoard® must be fully supported by at least
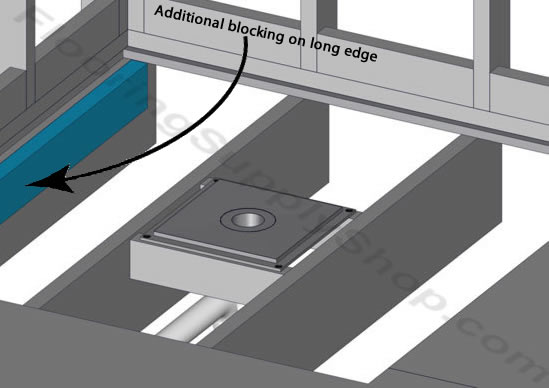
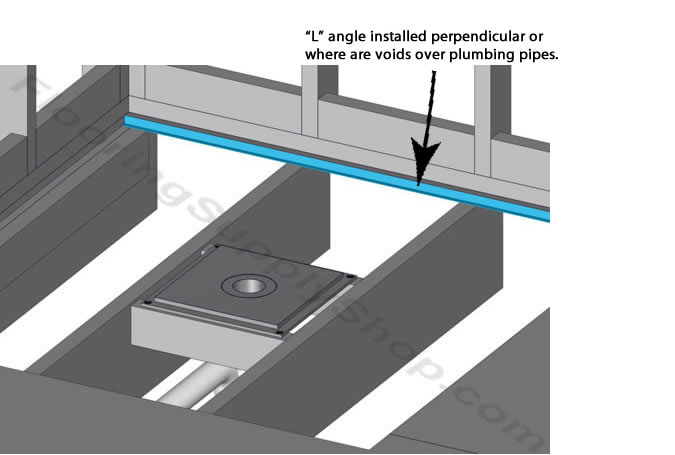
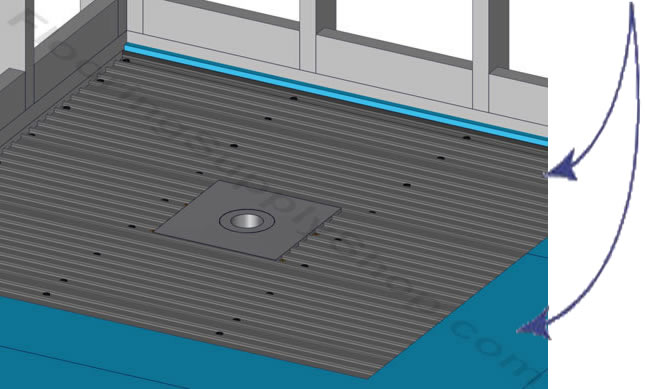
7. Install BackerBoard Around Subfloor Perimeter
” L” pieces are used as a precaution and should be installed around the perimeter of the shower to catch and support small amounts of mortar during the mortar application .’T’ pieces are not structural and should not be used as such. (If no voids exist after the fitting of TI-ProBoard to the opening, the “L” angle may not be needed.)
8. Mortar Mix Installed
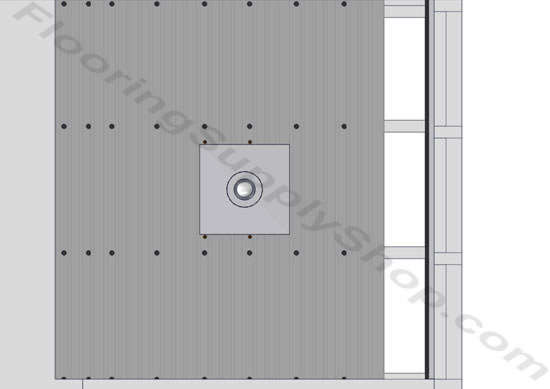
TI-ProBoard® must be installed perpendicular to the joist. Starting with the pieces that butt into the drain plate, measure, cut and dry fit the TI-ProBoard® to the shower floor opening. TI-ProBoard® must land on at least three joists or end blocking.
9. Fasten-TI-ProBoard to Joists and Drain Plate
Screw down TI-ProBoard® starting with boards centered on the drain plate. Use two of the gold screws to fasten TI-ProBoard to drain plate on each butt edge. Work from the center out to each edge. Placing one screw on each of the marked channels on each joist.
10. Install BackerBoard Around Subfloor Perimeter
Install ProTEC® or ProPanel® backer board around the perimeter of the new shower on top of subfloor to establish level of existing bathroom floor.
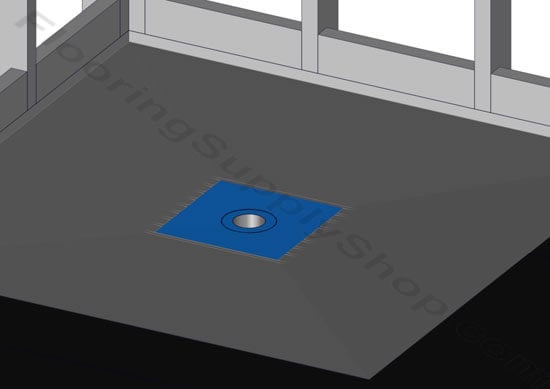
11. Prepare 4-1 Sand and cement mix with water. The sand/cement should comply with ANSI 108.1 B. Mixture should be workable to allow it to pack into the dovetail ribs. Completely fill the dovetails which will strengthen the floor.
12. Mortar Mix Installed
Using a screed, establish a slope for the mortar between the edge of the surrounding floor and perimeter of the drain plate. Extra work in smoothing the mortar and matching the slope at this time will be highly beneficial to the finished look. If the drain is at one end of the shower then you will have a steeper slope than the rest of the floor. Keep membrane on drain plate free of mortar. Allow mortar to set.
13. Clean Shower area free of any loose dust and mortar.
14. Apply the thinset to the substrate by using 3/16″V-notched trowel. Fit AQUA SHIELD to the shower area, allowing a minimum of 6 inches up the wall and extending at least 2 inches outside of the shower area. Press the AQUA SHIELD into the thinset by using the flat side of the trowel ensuring 100% contact with the substrate. Make sure to press out any air pockets and install with folded or tucked corners. Run the trowel over the fabric in a diagonal direction. The edges of adjoining AQUA SHIELD sections have to overlap by at least 2 inches. Cut out hole for the drain.
15. Installation behind ProTEC™ Concrete Backer Board or ProPanel® Waterproof Backer Board:
16. Concrete backer board must be installed with a waterproof membrane either behind backer board or applied to the surface. Leave a Y4” gap between the top of the shower floor and the bottom of the concrete backer board. Install backer board per TCNA Guidelines ensuring that the membrane on the (CBU) wall overlaps the Aqua Shield membrane.
17. Install Tile per TCNA guidelines.
Lifetime System Warranty Available with the use of Fin Pan Underlayments, WaterArmor, Niches & Seats. For full warranty details, visit our website, www.finpan.com/warranties. Can be Installed over engineered joist systems.
CLEARPATH® and ProPane!® are registered trademarks of Fin Pan, Inc. Used by permission. ProTEC”‘ and WaterArmor™are trademarks of Fin Pan, Inc. Used by permission. TI-ProBoard Is a registered trademark of TlleDIY, LLC. Used by permission. Aqua Shield Is a registered trademark of Blanke Corpor ation. Used by permission.
Always install tile according to Tile Council of North America (TCNA) guidelines
ClearPath Curbless Shower System – Video’s
Made in the U.S.A
Toll Free 877 880-8453
Copyright © 2010 FlooringSupplyShop.com